Category Archives: Products & Reviews

How to safely tighten bolts + Review: Bike Hand YC-617-2S torque wrench

If you like working on your bike, by now you should be used to turning and tightening bolts with a hex key or Allen wrench. Have you ever wondered that perhaps you’ve turned a bolt too tightly though?

WHAT IS TORQUE?

Most bolts on a bicycle actually have a torque specification. If you don’t remember your basic physics, torque is a measure of rotational force applied to an object along an arm of a given length. Torque is usually expressed in newton-meters (Nm) in the metric system, or pounds-feet (lb-ft) in Imperial measurement. In mechanics’ case, this arm is usually a wrench of some sort.

TORQUE SPECIFICATIONS

Normally you can turn a bolt in by hand until its head becomes flush with (and snugs up against) the surface you’re screwing it into. Once finger-tight, further tightening happens with a wrench, where you apply more and more torque to the bolt. As this happens, the tension also builds up along the length of the bolt you’re tightening, due to the interaction of the threads of the bolt and the receiving object. Exceeding the torque specification for that bolt can mean breaking it clean in half, as the material gives out under the tension. These broken bolts are quite hard to extract.

The seatpost clamp plate and rack adapter on my TCX SLR 2. Both these parts are holding up the bike’s carbon fiber seatpost, so the maximum torque value is clearly engraved on both.

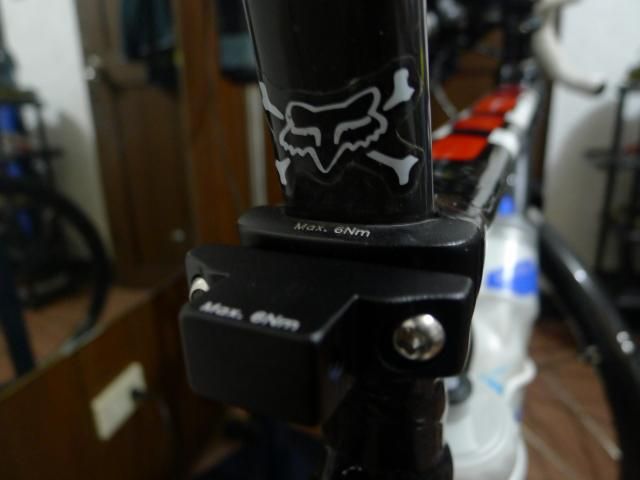
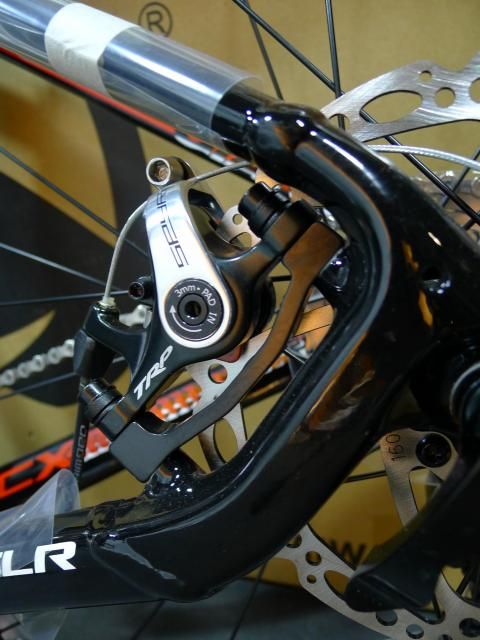
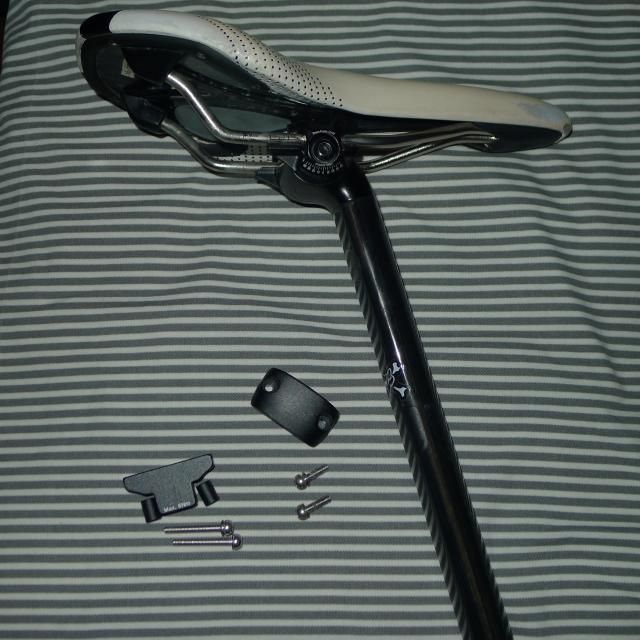
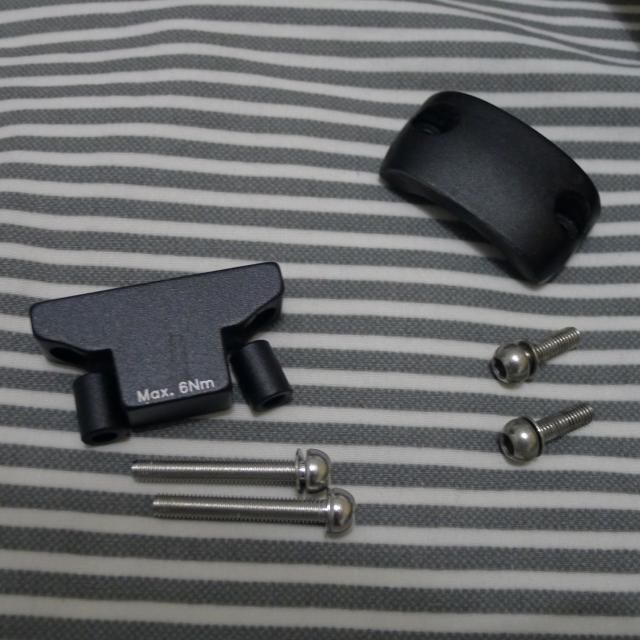
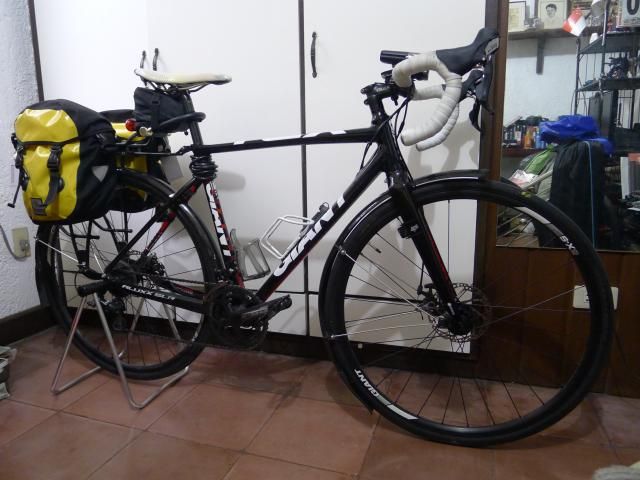
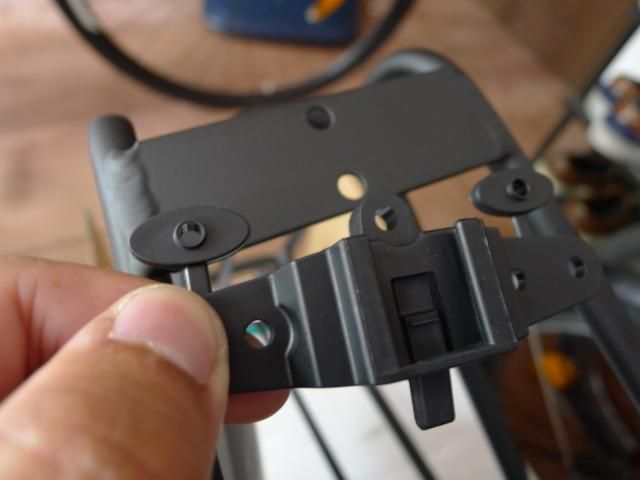
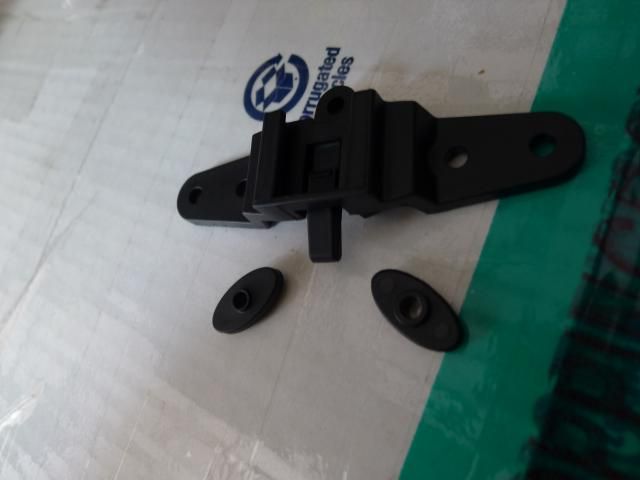
For the most part, metal parts are quite tolerant of a little excess torque. Torque specifications become really important, however, when you’re dealing with carbon fiber parts. Carbon fiber is a wonderful material, but one thing it’s not strong against is crushing force. If, for example, you have a carbon fiber seatpost and exceed the torque spec on its seatpost clamp, you will almost certainly damage the seatpost. Proper torque is also very important for the parts of a folding bike’s hinge and latch mechanisms, even though they’re made of metal.

TORQUE WRENCH TYPES

The dangers of applying excess torque are why a torque wrench is a worthwhile investment for serious mechanics. There are two general types.

A beam-type torque wrench being used to check a micrometer-type torque wrench. Photo courtesy of Park Tools.

A beam-type torque wrench is a socket wrench with a graduated scale, which you use to read the deflection of a freestanding secondary beam. That beam’s deflection off the main wrench arm is the applied torque. Beam-type torque wrenches are simpler and cheaper, and don’t need any maintenance, but require you to keep an eye on the scale. They’re best used for high-torque applications, such as crank arms and lock rings for cassettes or Centerlock brake rotors. These parts see torque loads in the 35-55 Nm range.

A micrometer-type torque wrench is different. Like its namesake, the end of the arm has a rotating collar used for measurement. On a micrometer caliper, this widens or narrows the caliper arms; on a micrometer-type torque wrench, it dials in the desired torque value. Once this value is reached, a clutch mechanism will release and give you both the characteristic “click” sound and slight deflection of the arm. Micrometer-type torque wrenches are more suited for the low-torque applications of most other bolts on a bicycle, but they do need periodic recalibration – and proper storage to reduce the need for recalibration.

Ritchey’s Multi-TorqKey is an example of a torque key. The two wrenches are preset to 4 and 5 Nm. Photo courtesy of BikeRadar.com

A sub-type of micrometer-type torque wrenches is the torque key. These are simpler devices which retain the clicking clutch mechanism, but ditch the adjustability. They are, in essence, made to stop at just one preset torque value, usually the most common 4 or 5 Nm – although Park Tool’s newly relased ATD-1 adjustable torque driver has five fixed torque values you can select.

We’ll be looking at Bike Hand’s YC-617-2S micrometer-type torque wrench today. This exact torque wrench can actually be seen sold and rebranded under various names.

 FEATURES

  • Micrometer-type construction
  • 1/4″ square drive socket
  • Reversible ratchet head mechanism
  • Included bits: 3mm, 4mm, 5mm, 5mm long, 6mm, 8mm, 10mm, T20 Torx, T25 Torx, T30 Torx
  • Torque rating: 2-24 Nm

IMPRESSIONS AND USE

Bike Hand’s torque wrench comes in a blow-molded black plastic box, made to house the wrench itself and all its bits. A metal double-hinge clasp keeps it shut.

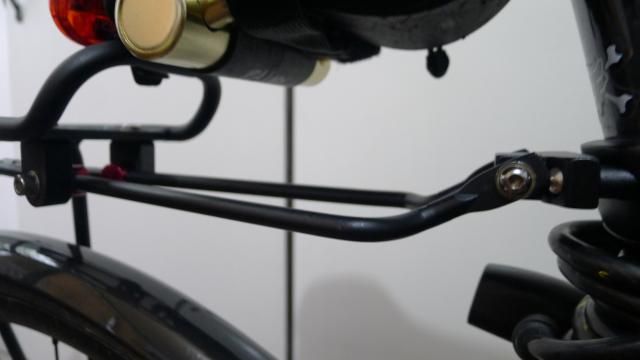
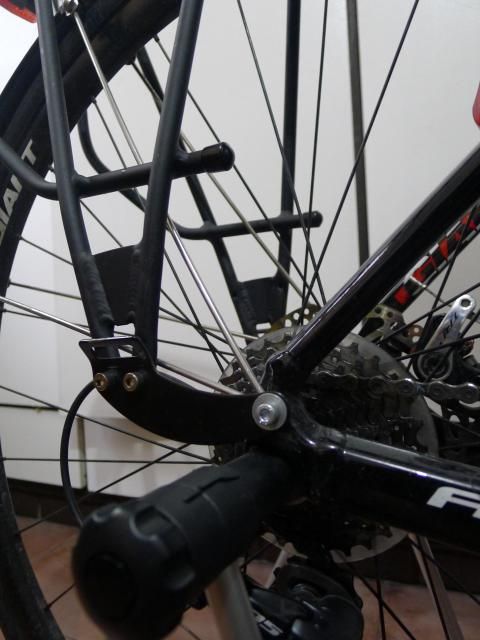
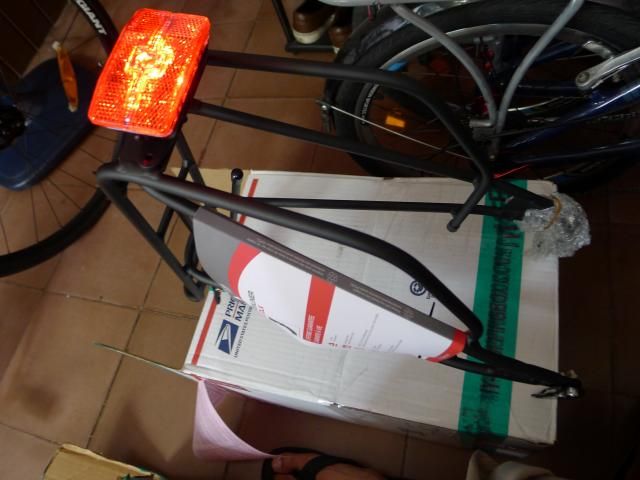
The selection of bits should guarantee that it will work with almost any bolt on your bike. On my Vitesse, 95% of its bolts can be worked on with a 5mm hex key. The larger size hex key bits are for use on kickstand mounting bolts (8mm) and freehub bodies (10mm). The 5mm long hex key bit is particularly useful for tightening the clamp band bolts on my TCX SLR 2‘s STI levers, which are slightly obscured by their brake hoods.

I like that all the bits themselves have a knurled collar around them. This enables you to turn loose bolts in by hand until finger-tight, before bringing in the torque wrench to tighten to correct torque. You press in the button on the head of the torque wrench to fit the bits onto the 1/4″ square drive socket, where they will stay on very securely.

The torque wrench’s scale for set torque, going all the way to 24 Nm. Here it’s set to just under 2 Nm for proper storage and to maintain its factory calibration.

Turning the collar sets the torque, displayed by a moving red column along a vertical graduated scale. This lets you use Bike Hand’s torque wrench on low torque applications such as stem and seatpost bolts, as well as higher torque uses, such as the 15-18 Nm needed to tighten the TCX SLR 2’s saddle clamp.

I find that for torque loads of less than 4 Nm, extra vigilance is needed as the clutch mechanism clicks very softly and the deflection isn’t very noticeable. At 5 Nm and up, the clutch mechanism works much better and more noticeably.

For more instruction on how to properly use a torque wrench, the boys of GCN have a video on it below.

VERDICT

I’ve had this torque wrench for quite a while now, and it’s a reliable tool to have, especially while working on the TCX SLR 2’s seatpost and stem bolts where setting correct bolt torque is critical. At PhP1,800 to PhP2,000, it’s not exactly cheap, but it’s one important tool to have in your arsenal if you’re serious about wrenching on your own bikes.

Review: Sugoi Zap bike jacket (2014)

Last year I discussed the importance of being seen by other road users and being safe from harm and the elements. Sugoi made headlines that year by announcing their Zap bike jacket, claiming to offer both. Does it live up to the promise?

FEATURES

  • “Pixel” fabric appears ordinary in daylight but becomes hyper-reflective when struck by artificial light, due to embedded glass micro-beads
  • Waterproof,  with storm flap and taped seams to avoid water ingress
  • Internal mesh membrane
  • Cycling-specific cut with dropped tail for bum coverage
  • Elasticated cuffs
  • Large rear pocket with Velcro closure
  • Available in three colors – red, lime green, black

IMPRESSIONS

When I got this jacket, I was so intrigued by Sugoi’s reflectivity claims that I immediately put it to the test by taking photos of it with the flash off, then on.

Front view of the Zap jacket under normal light.
Front view of the Zap jacket, taken with LED flash from my cellphone.
Rear view of the Zap jacket, taken with LED flash from my cellphone.

Sure enough, the Pixel fabric is a legitimate technology that does what it says on the tin…or fabric, in this case. Under daylight or normal overhead indoor lighting, it appears like a regular jacket. Shine a focused beam of light on it, however, such as from a flash bulb or a headlight, and the whole jacket becomes dazzlingly reflective – not just one or two details. Some of the glass micro-beads can even rub off the jacket and land on your person, making you appear to have reflective spots!

Here you see the Zap jacket rolled up into a jersey pocket. Some of the glass micro-beads will slough off the jacket and onto other surfaces, as shown in this flash shot.

I’m still a firm believer in running your lights while riding in order to be visible. That said, the jacket raises your profile to a much larger extent than if you were to use safety lights alone, which are basically “point” light sources. Anything reflective still relies on other vehicle drivers actually bothering to drive with their headlights on, however.

Judging the Zap on reflectivity alone doesn’t do it justice. It’s still supposed to be a jacket after all, and one that’s supposed to be waterproof in the rain, to boot.

WATERPROOFING VS. BREATHABILITY

Now, one important thing to know before proceeding: “waterproof” as an adjective doesn’t mean no water will ingress at all. Waterproof by clothing standards means an article of fabric will stand up to a certain water pressure or volume level before it eventually wets and gets soaked through. This can be improved by taping a garment’s seams, which are the points where water can seep in first.

Conversely, cycling as an activity will inevitably result in the rider generating sweat from underneath the jacket, and the term “breathability” refers to how well an article of fabric can let this sweat out in the form of water vapor. Rain gear that isn’t breathable is akin to riding your bike while wearing a plastic bag or sheet: you may not be getting rain ingress, but you will get wet from your sweat anyway. Common features meant to improve breathability are strategically located perforations or vents that are either fixed or can be opened and closed at will.

As you can see, waterproofing and breathability are two opposing sides of the same coin, and so each rain jacket out there is a compromise between the two conflicting goals.

The insulating ability of the material also comes into play here, to an extent. As long as you are moving on the bike, less breathability can be a positive factor if it means you can comfortably maintain your body’s warmth and guard against the wind getting in. This temperature regulation is why a good cycling rain jacket will keep you from catching a cold when riding, even when you’re sweating.

BEYOND THE REFLECTIVITY

So, having said all that, how does the Zap do? Pretty well, I should say.

The Zap jacket I have is a size XL. A little long on the sleeves and just a bit baggy in fit.
Note the dropped tail.
With the reflectivity working you can see the dropped tail much better. No photo manipulation here, folks – this photo is straight from my cellphone.

The jacket under review is a size XL. For someone like me, 5’7″ with a bit of a gut, perhaps the smaller size L is a better fit if you want your cycling jackets close-cut, but the XL is still a decent fit. The Zap has the classic dropped tail hem, which provides coverage for your bum while you’re bent over a road bike and pedaling or sprinting away. That dropped tail also houses a large single rear pocket with a Velcro flap closure, wide enough to swallow three granola bars side by side – or your phone and wallet. The cuffs are elasticated, which can cinch up the fit around the wrists, but I wish they had a Velcro or drawstring closure instead for more adjustability.

That rear pocket is the width of three granola bars. Pretty large.
Reflective granola bars anyone?

I’ve worn the Zap in quite a few rides where the rain was pouring at moderate strength for an extended amount of time. Worn with a cycling jersey, arm warmers, and a Uniqlo AIRism shirt as a base layer, it’s quite amazing how well and for how long it could keep the rainwater at bay. Given that level of rain, it would take 90-100 minutes of continuous riding before the arms and shoulders start getting damp from the rainwater – and you’d feel it, as it will be colder and clammier to the touch than the sweat you’re generating.

The Firefly Brigade’s March 2015 Critical Mass Ride, here passing SM City Sucat on a rainy morning. I’m the rider with the yellow helmet, and while riding at a slow pace, the Zap jacket kept me comfortably dry. Photo courtesy of the Firefly Brigade.

That said, on the scale of compromise between waterproofing and breathability, the Zap leans more toward the former. The Pixel fabric and interior fleece mesh lining excel at insulation and trapping your body heat to keep your core warm and comfortable. It also means the Zap really is a jacket for sustained rain and cold, gloomy conditions. There are no underarm perforations or added zippers to open for more breathability when needed; if you get too hot under the collar, your only option is to open the main zip. Given how warm it can get in the Philippines, this is a minor letdown for people expecting to wear the Zap year-round for better visibility at night. It’s fairly bulky rolled up in a jersey pocket, so not the most “packable” jacket out there, and the storm flap is a little strange and unwieldy in that it sits on the left side of the jacket, rather than parallel to the zipper on the right side as on most others.

VERDICT – YEA OR NAY?

Given how well it delivers on its promises, however, the Sugoi Zap jacket is a very good piece of cycling kit, one of those investment-grade items worth saving up for. It should last you years if taken care of properly, and it’s a useful addition to any cyclist’s wardrobe.

Perhaps subsequent versions of the Zap can incorporate more ways of tweaking the fit and better breathability, or it may even spawn a lightweight windbreaker version for more everyday use as a bike commute garment.

Review: Shimano Saint PD-MX80 flat pedals

The pedals are one of three main contact points you have with your bike, and it makes sense to get some good ones. I’ve mentioned the Shimano Saint pedals in previous posts, but haven’t dedicated a review post to them yet.

FEATURES

  • Weight: 500g for the pair
  • 9 traction pins per pedal face, installed from the rear via included Torx wrench
  • Traction pin height adjustable with included washers
  • Mud shedding design
  • Install with either a 15mm pedal wrench/open wrench or a 6mm hex wrench
  • Reliable Shimano cup-and-cone bearing and spindle system for maintenance

IMPRESSIONS

The Saint pedals come in this nice box.

Saint is Shimano’s mountain bike groupset for gravity racers and downhill riders, so these pedals are expected to withstand the rigors of extreme trail abuse. Some MTB friends have said that these pedals will likely outlast the bike they are installed on. With that logic, I thought they should be a good fit for the TCX SLR 2. I’m not quite sold on clipless pedals and cleated shoes for my riding purposes, and these seem to be some of Shimano’s best flat pedals around.

All the box contents. In the plastic bag with the rebuild manual, you can see the extra traction pins, washers and Torx key.

The MX80 pedals come in a spiffy box, with the right and left pedals individually wrapped. They come with instructions for rebuilding the pedals, should you want or need to service them. They also come with the handy Torx wrench (I believe it’s a T10), which you’ll need to install or remove the traction pins.

The pedals themselves are a nice black and silvery-white color, with a splash of gold on the spindle. Viewed in profile, they have a slight concavity to their shape, meant to better locate your foot onto the pedal face.

The Saint MX80 pedals in profile.

Out of the box, they have a complement of 28 traction pins installed, seven per pedal face, and each of the pins has a washer. Eight spare pins and washers are kept in a bag, either as spares or for filling all nine pin slots per pedal face. The traction pins install from the rear, meaning damaged pins can still be removed. Removing the washers exposes more of the traction pins’ length and should dig deeper into the soles of your shoes, literally biting into them.

If you’re not careful, however, these same traction pins can bite into your calf, ankle or shin. If you get self-inflicted ankle wounds from these traction pins, make sure you get them cleaned and disinfected ASAP. An infected ankle will definitely hinder your mobility – and really hurt!

After some trial and error, and the misfortune of an infected ankle, I ended up removing the pins on the inside edges of the pedals. The remaining pins are now all on the perimeter of the pedal body, with the center forward pin relieved of its washer for better bite on the front. This setup works well for general riding and commuting purposes on asphalt.

Fresh out of the box.

As for the pedals themselves, they are really solid platforms for putting your leg power down. I haven’t wanted for more stiffness out of them. They could perhaps use a bit of a diet, but I wouldn’t trade reliability for lighter weight. Mine are scratched up from daily use, but still spin smoothly with buttery resistance – no service needed yet.

Scratched up and dingy now, but still going strong.

VERDICT – YEA OR NAY?

I got my MX80 pedals for PhP2,000, and they have been utterly reliable. All indications point toward them staying that way for months or even years to come, and they are easily serviced once they need some TLC.

If you come across a pair at a good price, buy them. You will not be disappointed.

Review: PowerClean Chemicals Water-Based Engine Wash Degreaser

Recently, I had a fairly lengthy write-up on my procedure of bike cleaning – and I mentioned the use of degreaser. Unlike in the US or other countries, looking for a degreaser to clean your bike’s drivetrain parts with can be a chore.

“Degreaser? Anong degreaser? Walang ganyan sa bundok namin ma’am, sir…”

A 946mL spray bottle of Simple Green Multi-Purpose Cleaner next to a 1L bottle of PowerClean Water-base Engine Wash Degreaser. The simpler bottle is more than two times cheaper.

Technically, you could use dishwashing liquid in a pinch. Some of them advertise themselves as “grease strippers” and they do perform a fairly good job. I’ve used Simple Green Multi-Purpose Cleaner on occasion as well, but it’s not always available, and it can be a bit pricey at PhP175 for a 946mL spray bottle. There may be better, more dedicated solutions out there, I thought.

On the recommendation of our own Byron Villegas, I decided to pedal to a local branch of PowerClean and pick up their water-based Engine Wash Degreaser for use on the TCX SLR 2.

USE AND IMPRESSIONS

The orange liquid is very slightly viscous yet mostly free flowing as it comes out of the bottle; I was told by the PowerClean shop clerk that this can still be diluted if necessary. It’s mildly fragrant, too. Using it straight from the bottle in my Finish Line chain cleaner, I noticed how effective it was in removing the gunk from my chain and leaving it sparkling after 90 crank rotations. It works a little better than the lighter-weight, less viscous Simple Green in this respect, and it certainly sticks to the chain cleaner’s brush bristles better.

Simon Richardson shown here using an old paintbrush to “paint” degreaser onto a cassette. Photo is a screengrab from GCN’s “30 Minute Bike Wash” video – click on the photo to watch!
Here, Simon paints degreaser on SRAM Red chainrings. Photo is a screengrab from GCN’s “30 Minute Bike Wash” video – click on the photo to watch!

Following the advice of others on bike washing upon my further reading, I got a cheap 1″-wide paintbrush and used it to “paint” the degreaser onto my drivetrain parts – specifically the cassette and chainrings. After doing so, the instructions tell you to let the stuff sit on the objects being cleaned for a few minutes…which you can spend drinking your cup of morning coffee and/or gulping some breakfast.

When I came back after twenty minutes, I saw the cassette now sparkling clean, save for a few isolated greasy spots. A subsequent light coating of the degreaser and some light persuasion with the paintbrush pushed the remaining spots away. My chainrings are black, so improvements aren’t so obvious, but they came out just as clean, too.

With minimal work, PowerClean’s degreaser sure did a number on my cassette. Imagine what it can do to a car’s dirty engine bay?
This is the shiniest used chain I’ve seen in a while. The chainring teeth got pretty clean from the degreaser, too.

The degreaser effectively did the grunt work of cleaning up the drivetrain, which means you can ultimately use less of the stuff, expend less effort scrubbing, and save some money.

A caveat: Once done, you will need to make sure that you thoroughly clean it off the chain by using a hose with low water pressure and a rag. Any degreaser left over in the chain links will destroy any chain lube you apply inside the roller pins of the chain.

VERDICT: YEA OR NAY?

PowerClean sells their water-based Engine Wash Degreaser through its various branches (quite a number of them within Metro Manila) in either a one-liter bottle for PhP75, or a one-gallon (3.8L) bottle for PhP220. That’s a pretty good deal, and a one-liter bottle exclusively used for cleaning bikes should last a pretty long time. It helps the patriotic conscience no end that this, like the rest of PowerClean’s stuff, is made right here in the Philippines, too. Add to that the purported water solubility and green credentials of the product, and it’s a win-win situation in my opinion.

Highly recommended.

Drop bars and the joys of fresh handlebar tape

For road cyclists, there are few tactile delights as quick to transform and rejuvenate your bike as freshly wrapped handlebar tape. After all, it is one of the three primary contact points you have on a bike, and it is also arguably the one through which you communicate the most with the road.

HAVE YOU GOT OPTIONS

Bar tape comes in many different forms. Traditionalists and the truly old-school swear by classic cotton tape, with a layer of grip-enhancing twine wound on top and finished off by a protective brushing of glossy shellac. Nowadays though, many bar tapes are made up of either cork or EVA foam (for shock absorption), leather, or various rubbery materials that become tacky when wet. Some people even use butyl inner tubes as bar tape.

Common to all of them is that they will wear out with use, becoming knackered and tattered with time, so they do need to be replaced every now and then. (This is especially true for white bar tape!) It is usual practice to change bar tape at the same time you replace your brake and shift cables and cable housings, since these are hidden under the bar tape.

Selle Italia Smootape bar tape in white
Mine is the “Granfondo” variant
“Smootape” is so named due to how it supposedly avoids the lumps that form on wrapping and overlapping of the tape on itself

FRESH CABLES, FRESH BAR TAPE

It just so happens that I recently sent my Giant TCX SLR 2 to LifeCycle for brake cable replacement, a maintenance job I don’t yet have the tools for. While I was there, I bought fresh bar tape for me to install at home. It is a simple enough job, requiring only a pair of scissors and some electrical tape.

The finishing strips in this case are basically long stickers, not electrical tape

The box of bar tape itself usually includes everything else that you’ll need:

  • Two rolls of handlebar tape (obviously)
  • Two extra strips of handlebar tape
  • Bar end plugs
  • Finishing strips – these can either be tape or stickers

WRAP THAT BAR!

Now, there are a great many ways of wrapping bar tape, and each one has its fans. The method I’ll share today is just one of them, and notably it doesn’t make use of the two extra strips of bar tape that come in the box. These are normally used to cover up the clamp band on the brifters. As a general idea, I will be wrapping the tape from the outside in, then transitioning from back to front as I move to the bar tops.

We begin by first folding back the brifters’ brake hoods and stripping the old bar tape off the handlebars. Doing this exposes the cables and cable housings; make sure that they are securely fastened to the handlebar with electrical tape. The old bar tape may leave some adhesive residue on the bar itself; you can clean this off with some alcohol.

My bars with the old bar tape
Brake hoods pulled back
Undoing the electrical tape at the end
Unraveling from the bar tops
As more of the old tape unravels the brifter clamp band gets exposed
Old tape off
Bare aluminum alloy handlebar
A quick inspection of the engraved markings shows that this drop bar is made by Satori for Giant as an OE item. Width is 400mm.

I start wrapping at the bottom edge of the very end of the drops. Place the tape so that half of it is on the bar, and half of it hangs in the air. Then, wrap one full turn around this initial bit of tape, toward the outside in, while pulling and keeping tension on the tape. Keeping this tension is important; this is primarily what keeps the bar tape wound around the handlebars, with the underside adhesive performing only a secondary role.

The underside of the bar tape has either conventional adhesive or a tacky rubbery layer; this is an example of the latter and it’s usually better if you want to reuse or re-wrap the bar tape
Beginning the wrap
The initial full turn of half-overhanging bar tape
Wrapping at an angle or bias upward from the end of the bar
IMPORTANT: Keep tension applied on the tape as you wrap

After this initial turn, I start to wrap diagonally along the drops, going up toward the brifter, while overlapping some of the tape upon itself. You can use the adhesive strip on the underside of the bar tape as a sort of guide to determine how much overlap you want. The amount of overlap will tend to vary as you go along, especially around curved portions of the bar, where you want smaller overlap on the inside curves. Remember to keep that tape under tension!

With half the bar tape’s width remaining from the brifter clamp band it’s time to think about the figure-eight

Approaching half the width of the tape to the clamp band of the brifters is when we perform the figure-eight bend that will cover up this area in lieu of the two bar tape strips. The trick to this method is to look at the brifter from the side as a fixed point of reference.

  1. First, feed the tape along the underside.
  2. Then pull the tape upward, wrapping once around the same plane as the brifter hoods.
  3. As you pull the tape downward, wrap it once around the back underside of the brifter lever, then wrap around the front. This is your chance to cover up any exposed clamp band or bar.
  4. Wrap once around the same plane as the brifter hoods again, as in #2. This is also the final chance to cover up any exposed clamp band or bar.
  5. If you did the figure-eight bend correctly, after clearing and wrapping the bar tape around the brifters, you should now be continuing your wrap from back to front.
  6. Remember to keep that tape under tension!
To begin the figure-eight, wrap behind the bar to cover the clamp band, then go over the brifter hood body
Next, go back under the bar to cover the brifter clamp band a second time, then wind the tape forward to cover the bare bar underneath the brake levers
Finally, wind the tape to the back again and pull upward on the outside to continue the wrap and finish the figure-eight. Done correctly, this should mean you are now wrapping back to front
For the bendy bits of the bar, tighten the overlap on the inside of the curves, but maintain enough overlap on the outside to keep the bar covered up

After varying the overlap for any remaining bends, you should be thinking about how to finish off the bar tape wrap as you approach the stem. You do this by scribing or lightly scoring the bar tape with your scissors at an angle, so that the end of the wrapped tape lines up straight. Once satisfied, you can cut the excess tape off. Remember to keep that tape under tension!

Scoring the final bit of bar tape in preparation for the cut – do this at an angle and it should leave you with a straight finish

At this point you should have your roll of electrical tape ready. Wrap the final bit of bar tape, then stick the electrical tape directly on top of it, some way behind the very end of the bar tape. Do not stick the electrical tape to the bar itself as this just makes the finish sloppy and the adhesion uneven. The electrical tape is nowhere near as elastic as the bar tape, so ideally it should be put under just a little tension, relying mainly on the adhesive to keep it in place – wrapped around itself. Wrap the roll of electrical tape around the bar tape three or four times, then cut so that it terminates on the underside of the bar, making it invisible.

Terminating the bar tape
Stick your electrical tape a short distance before the bar tape terminates, then start wrapping
Three or four turns of electrical tape should suffice. Cut the tape so that it terminates on the underside of the bar

Finally, to finish the job, roll back the brake hoods and return to the drops and the start point of the bar tape wrap. Fold the hanging bits of bar tape into the hollow of the bar. As you keep the bar tape inside the drop bar, take your bar end plug and push it in to anchor the bar tape in place.

Fold the hoods back over the brifters to ensure no amount of bar is left bare
Return to where you started to finish off the wrap job
Push all the overhanging bar tape inside the bar
Finally, take your bar end plug and push it into the bar to anchor and tidy up the excess bar tape

You should now have a bike that feels significantly newer and fresher – just from swapping out bar tape!


Review: Axiom Streamliner Disc DLX rear rack + Cat Eye Reflex Auto (TL-LD570R) safety light

When I got the TCX SLR 2, I stated it doesn’t need upgrades other than a set of fenders and a rear rack. Unfortunately, these two items are very hard to find locally. Whenever people talk about racks for bikes, 95% of the time they refer to contraptions to hang them on a  vehicle. Seldom do they think of an apparatus to help a rider carry his/her loads.

CAST YOUR BURDENS UPON THE BIKE

One reason why bike touring enthusiasts are able to pedal very long distances is because they let their bikes do their load lugging for them. Freeing the body from all burdens other than pedaling increases  long-term endurance and comfort. This also benefits handling, as the center of gravity is much lower with a rack and panniers compared to carrying your load on a backpack. To do this, they invest in bike frames that accept the installation of racks – usually at the rear, but sometimes even at the front as well. This is usually done via threaded holes, called “eyelets,” found somewhere on the rear triangle. For rugged touring bike framesets that can carry a front rack, the fork legs will also sport eyelets.

With the right frame as the basis, the next step is to look for suitable racks to hang your panniers from.

Bicycles with disc brakes pose a peculiar dilemma when installing a rear rack. Most rear racks have a lower mount meant to mate with  frame eyelets close to the dropout area. If the disc brake caliper is mounted on the seatstay, outside the rear triangle, mounting a rear rack becomes a more complicated affair as the rack’s lower mount has to clear the caliper somehow. To address this, rack makers have released products that are specifically meant to mount on frames that use disc brakes.

The TCX SLR 2 mounts its TRP Spyre disc brake calipers on the chainstay, inside the rear triangle. To the right is the “hidden” eyelet.

Many newer disc-brake road bikes mount their brake calipers inside the rear triangle, on the chainstay. This improves compatibility with rear racks and reduces the fuss of installation. The TCX SLR 2 is one of these bikes; in fact, this was one of my main criteria in selecting it.

After reading a few reviews, I decided on the Axiom Streamliner Disc DLX rear rack. This is a 700g aluminum unit painted in matte black, rated for a maximum load of 50 kg (~110 lb). Unique to the Streamliner series are curved lower mount feet, which set the legs backward to increase heel clearance from pedal to pannier while pedaling. Incidentally, this feature also helps clearance from a seatstay-mounted disc brake caliper. The upper mount arms are also length-adjustable. Lastly, Axiom makes a big deal of how the Streamliner racks are more aerodynamic, with sides that taper toward the top, in an effort to bring the mounted panniers closer to the center line of the bike and reduce the frontal area. However, this tapering isn’t so noticeable on the Disc version.

INSTALLATION

Unlike the fiddly installation of the fenders, installing the rack was mostly hassle-free and straightforward. By comparison, the TCX SLR 2 is much better equipped to accept a rear rack. Both can share the same pair of eyelets down by the rear dropouts. All you will need are slightly longer bolts to ensure at least three turns’ worth of screw thread is left exposed through the eyelets, and washers to ensure the exposed bolt ends do not interfere with the chain in the smallest cog.

Seatpost removed from the TCX SLR 2. The round plate is the seatpost clamp plate and below it are the two original-length bolts. For mounting a rack, set aside these bolts and use the longer ones below the block adapter and cylindrical washers.
A close-up of the block adapter, seatpost clamping plate, and the two sets of bolts. Regardless of rack, the max torque for these is 6Nm to avoid damaging the seatpost.

To mount the rack’s upper arms, Giant bundles a block adapter, cylindrical washers, and longer hex bolts for the seatpost clamp plate within the TCX SLR 2’s build kit. You remove the normal hex bolts on the seatpost clamp plate, then thread the longer bolts though the block adapter, cylindrical washers and seatpost clamp plate as you torque them into the bike’s top tube. The block adapter will provide the mount points for the rack’s upper arms. This is a neat solution, and you could easily run the bike with its rack removed, but the adapter block left attached.

Rack mount adapter installed. Note the eyelets on the sides. Those are where the upper mounts of the rack will bolt into.
Upper arms mounted to the bike. They telescope by loosening the side bolts on the left.
Drive-side eyelet shared by the rack and rear fender.
Non-drive-side eyelet shared by the rack and rear fender. No problems with the disc brake caliper mounting here.
Rear rack install complete
My Vincita B050WP-A panniers mounted midway on the length of the rack. So far I have had no heel strike issues while riding with panniers.
At last: My TCX SLR 2 in full commute trim!

Axiom’s build kit is comprehensive, coming with all the bolts and hardware you’ll need. I do question, though, the use of fragile 3mm hex bolts on the upper mounts, and needing 4mm and 5mm wrenches to adjust the telescoping length. I feel they would have been better off with using 4mm for everything, but it is what it is, I guess. The mounting is as simple as can be; I went into the install blind and the process went very smoothly. In operation, the Streamliner does its job without fuss, although daily use of the rack and any panniers you mount does scuff and scrape the matte black paint away, exposing the shiny aluminum underneath. That’s to be expected, as the pannier hooks will leave their mark. All things considered, the Canadian outfit deserves a medal.

BUT WAIT, THERE’S MORE

Like most other racks, the Streamliner unit has a mount plate for a rear safety light. I decided to mount a Cat Eye Reflex Auto TL-LD570R unit back there, which is both a standalone reflector and an automatically activated rear safety light. When the switch is set to its “active” mode, it turns on automatically by input from a light sensor and a motion sensor, and will turn itself off after thirty seconds of inactivity. This is a great idea, as with a simple modification, you could ride knowing that you always have a rear light working to keep you seen by other road users.

The Axiom rack’s mount plate for a safety light. In the foreground is Cat Eye’s rack mount bracket. Not seen here is a theft-deterrent measure: the bracket has a screw and washer designed to lock the Reflex Auto into place.
Cut off the two plastic loops as these will be used for the mounting of the bracket to the rack with supplied screws.
The Reflex Auto light mounted to the rack.

The only modification I needed is to disable the light sensor, by covering it with some electrical tape while the light body is open. This “blinds” the light sensor, and effectively turns the safety light on with only a shake or movement of the bike.

As a safety light, the Reflex Auto isn’t too shabby either. It offers five different modes:

  • random strobe 1
  • random strobe 2
  • pulse glow
  • regular flash strobe
  • steady glow
The rear of the rack with the Reflex Auto tail light mounted. Axiom’s advertised upwards “taper” of the Streamliner racks isn’t very obvious on the Disc version – which is no big deal.

Of all the modes I make use of the pulse and steady glow ones the most. I have two other safety lights so I relegate those for flashing purposes. This functionality is helped by the sheer size of the light unit; you effectively have a palm-sized red rectangle on your bike when it’s on, visibility is good even on the sides, and it doesn’t have to resort to obnoxiously bright LEDs to get you noticed by other road users. A sexy tail light it ain’t, but it’s one of the better-thought -out ones.

With this, my Giant TCX SLR 2 “all-weather commuter bike” project is mostly complete. I can think of only a few things left to change out or “upgrade” on the bike, and those are for comfort or maintenance/maintainability purposes.

10917889_10201972632957969_5796182401660365678_n

Review: Cat Eye Volt 1200 (HL-EL1000RC) front light

As a bicycle commuter, I’ve already discussed the importance of being seen on the road, and one of the most effective ways of doing so is by using good bike lights.

Front lights, in particular, occupy a broad spectrum of options. There are low-powered models that are meant to increase a cyclist’s visibility to other road users, but don’t do so well for illuminating the road. Other models rated for higher light output can cut through the darkness and light up your way as you pedal, highlighting potholes and road acne in advance so you can take avoiding action.

The light I’m reviewing today undeniably belongs to the latter category. We take a look at Cat Eye’s Volt 1200.

FEATURES

  • High-intensity white LED x2 in OptiCube beam-shaping housing
  • Maximum output: 1200 lumens
  • Five operating modes
    • Dynamic – 2 hours at 1200 lumens
    • Normal – 5 hours at 600 lumens
    • All-Night – 17.5 hours at 200 lumens
    • HyperConstant – 14.5 hours at 200 lumens + 600 lumen strobe
    • Flashing – 100 hours
  • FlexTight handlebar bracket mounting
  • Aluminum body
  • Water-resistant
  • Replaceable 3.6V 6200mAh cartridge battery
  • Recharge time
    • 14 hours via USB 2.0 @ 500mA
    • 8 hours via high-current USB @ 2000mA
Retail packaging.

OUT OF THE BOX

Box contents: The Volt 1200, FlexTight bracket and microUSB cable.

The Volt 1200 comes in a nice cardboard box. Inside are the light itself, the micro-USB charging cable, instruction leaflet, and the FlexTight handlebar mount bracket. This is the exact same mount used by my other front light, the much smaller and lighter Cat Eye Nano Shot (HL-EL620RC).

The Volt 1200 disassembled by a hex key. The SD card is there for size comparison.

As an all-in-one torch-type unit, the black cartridge battery is pre-installed into the lamp body, mounting via three bolts. You can undo the bolts with a hex key and mount a spare battery if you had one, but obviously this isn’t a quick affair. Besides, the huge battery is enough for most rides, especially when kept out of the higher-output modes. At 6200mAh, it dwarfs most cellphone batteries in pure capacity. My own Lenovo P770 smartphone has quite a large battery at 3500mAh; the Volt 1200 practically doubles that.

The aluminum body of the Volt 1200 acts like a heatsink, with a row of ridges on its top. Running at 600 or 1200 lumens means this can become quite hot, which is normal. The light has a little sticker on its underside warning of this, next to the rubber gasket flap for the micro-USB charging port.

PERFORMANCE IMPRESSIONS

The first time I turned it on, I laughed maniacally. An honest-to-goodness 1200 lumens! This is a seriously strong light in Dynamic mode, and it can temporarily blind people when aimed the wrong way. The beam is so potent that it handily outshines most indoor lighting. Headlight aim becomes critical when using the Volt 1200. I find it’s better angled slightly downward, 15-25 degrees from horizontal. The sheer volume of light means you will definitely be seen – it’s best employed by illuminating your path, and by brute force it will light up quite a way into the distance.

1200 lumens from the Volt 1200 vs. 200 from the Nano Shot. The bigger light throws the light farther.

In terms of beam shape, the OptiCube reflectors and optics tightly control it to give you a focused rectangle of light with minimal spill, instead of a floodlight effect. Some people may want more peripheral light, but I find that the tight beam works well when you’re pedaling at higher speeds.

You’d think the 214g Volt 1200 would overwhelm its tiny FlexTight bracket, but this isn’t the case. Tightened properly, I never had a problem with the light drooping on the bar at all, even through bad roads.

OPERATION

Most people will see this light and think “I don’t have use for a 1200 lumen front light!” Well, true, in most cases it is overkill. However, the real draw of the Volt 1200 is how versatile it is. If the max output was the only good thing about this light, this review would have ended already.

The five modes are all good compromises between light output and battery life. You cycle between the main modes in decreasing order of brightness using a single press of the top button (Dynamic -> Normal -> All-Night -> HyperConstant, then repeat). Pedaling along East Service Road at 10 pm, at 18 km/h average speed, I used the 600-lumen Normal mode most of the time to light up the path, while being seen by the cars and trucks that ply the route. I reserve the full 1200 lumens for short bursts in very dark spots. In the daytime, I run the HyperConstant mode, which is a constant 200-lumen beam with a 600-lumen flash strobe, and this helps with visibility.

Below are sample beam shots taken with my camera. The light is mounted such that it is around 20 degrees down from horizontal. Settings are constant across all photos: ISO 400, an f/2.8 aperture, 1/2 second shutter, and 50mm-equivalent focal length. For distance reference, the white vehicle in the distance is 100 meters away.

Volt 1200 off.
Volt 1200 in the 200-lumen All-Night mode. The steady beam of HyperConstant mode is the exact same brightness.
Volt 1200 in the 600-lumen Normal mode.
Volt 1200 in its maximum Dynamic mode. Even with the light angled around 20 degrees down from horizontal, it’s still illuminating around 60 meters of the road ahead.

Perhaps the only mode I don’t use at all is the Flashing mode. This turns the light into a high-powered blinker with an annoying pulse frequency. I prefer HyperConstant for this purpose, as the pulses aren’t so quick, and the constant beam gives oncoming traffic a better way of estimating distance between you and them.

Unfortunately, accessing the Flashing mode inadvertently (a double-press of the button, accessible at any time) is done way too easily. In practice, you may find that while trying to turn down the brightness, pressing too quickly triggers the borderline obnoxious Flashing mode.

The gasket and contacts on the massive 6200mAh battery.

Once the Volt 1200’s button glows red, it’s time for a recharge. Left alone long enough, it will automatically step down in output to squeeze as much run time out of the battery. At 6200mAh of capacity, charging this beast will take a while, and I would suggest investing in a high-current USB charger. The Volt 1200 has a useful way of discerning between normal and high-current charging. Normal charging leaves the button glowing red, while high-current charging is shown by a slow-cadence flashing.

VOLT 1200: YEA OR NAY?

I’ll get to the elephant in the room: this light isn’t affordable. Cheapskates are going to shy away from this light from the price alone, no matter what merits it has.

That said, 1200 lumens hasn’t been priced like this before – not from an established lighting brand. Not too long ago, you had to pay an arm and a leg for a light of equivalent output – and not in an all-in-one unit, to boot. Year on year, the improvements in bicycle lighting technology have become so great that my 200-lumen Nano Shot has been overtaken by the Volt 300 three years later, which packs 300 lumens in a package that’s half the price. If you look at the Volt 1200 as an investment, in that you’re buying a torch-type light that is ahead of the technological curve for about five years, coupled with the potential of buying replacement batteries…the price tag doesn’t seem too bad.

The remnants of what appear to be aluminum oxide between the cooling ridges. I’ve scratched most of it off with my fingernail.

Also worth noting is that the bare aluminum on my own unit has shown a few signs of cosmetic minor corrosion. This is most evident in the clingy greenish hard powder in between the cooling ridges (which I assume is aluminum oxide) and some blistering on the underside. No adverse effect on the light’s function, though, and it might simply be due to my sweat falling on the lamp’s metal body. The Volt 1200 is still as solid as the day it was unboxed.

The blistering on the underside. It’s usually found where the stickers are. It doesn’t look great, but it’s all cosmetic and doesn’t affect the functionality at all.

You may question the value of a 1200-lumen headlight, but the great thing about the Volt 1200 is that it is so much more than that. The capacious battery, great beam control, and a thoughtful selection of modes mean that this multi-role light excels at endurance – it can be the light you need it to be. Mount it to a mountain bike, turn on Dynamic mode, and see the trail light up right in front of your eyes. In practice, while riding with the light in HyperConstant mode in the daytime and Normal mode at night, over a total of two hours’ commuting per day, the battery will last a week with juice to spare. Charge it overnight using a good high-current USB charger, and you’re good to go the next day for another week’s worth of riding.

VERDICT

Reliable, powerful and well thought-out – one of the better lights around. An investment worth saving up for.

Review: SKS P45 Longboard bicycle fenders

As of this writing, we are smack dab in the middle of the rainy season. Riding a bike in this kind of weather presents its own risks and downsides – not least of which is a grimy, dirty stain down your shirt and butt affectionately called by cyclists as “the skunk stripe.”

See how grimy this guy’s butt and back are? That’s the skunk stripe in action. Photo courtesy of bikecommuters.com.

This large stain is a headache to rain riders because it is so hard to launder out of the fabric. While the rain falling from above is pretty clean, the water from your riding surface is anything but. In the first few minutes following any rainfall, the oils from the asphalt and passing vehicles leach out into the road. Not only do these tend to decrease the grip of your tires, they also make for a binding adhesive for dust and dirt. If this stuff is thrown up by your wheels’ spray and ends up on your clothing, I bid you good luck washing it out. This spray also isn’t good for your front derailleur and crankset, either.

Remember my Dahon Vitesse T10? It had SKS fenders as stock. These seem to be a hot-ticket item on selling forums, too.

Many folding bikes come with very good full-length fenders installed as stock equipment, and they are very effective at keeping you clean as you ride. If you move up to a road bike, however, what options do you have? Most fenders available locally are MTB-style jobs which don’t offer anywhere near the same amount of coverage.

Since my Dahon Vitesse T10 came with very good SKS fenders, I decided to look for similar items for my Giant TCX SLR 2. Today we’ll be looking at the SKS P45 Longboard fender set.

SPECIFICATIONS

  • Made of a sandwich construction of plastic and aluminum
  • 45mm wide, will fit 700c tires with widths from 28mm to 37mm
  • Secu-Clip safety feature on front stays – designed to release when foreign objects get wedged between the front tire and fender
  • Stainless steel stays
  • All mounting hardware included

OUT OF THE BOX

Retail packaging

SKS weren’t kidding when they said the Longboards – an offshoot of their long-running Chromoplastics series – are their largest, fullest-coverage fenders available. I mean, just check out the rubber mudflap on the front fender.

How low does your front mudflap go?

The “P45” designation means these fenders are 45mm wide. SKS recommends fenders at least 7mm wider than the tire tread width, so the P45s are the way to go for a cyclocross bike with 35mm-wide tires in a typical configuration. A road bike running 20-28mm tires will be better served by the P35 variant.

Inside the packaging are the fenders, the front and rear stays, the instruction sheet, and a bag containing all the washers, nuts and bolts, as well as the fender stay end-caps and the sliding bridge piece for the rear fender. You’ll need a 4mm hex key for the bolts, an 8mm socket wrench for the stay nuts, and a metal saw or hacksaw to cut the stays down to size. Bring out a permanent marker and tape measure, too, and a vise would be very useful.

Contents. The front stays have the black Secu-Clip fittings. Wrapped in plastic is the rear fender.

INSTALLATION…

The installation instructions are some of the worst I’ve seen. I’m used to seeing quality diagram-based instructions while installing everything from plastic models to car underbody parts, but SKS has the bare minimum of diagrams and resorts to explanation to walk the user through. You’re better off watching installation videos from YouTube instead.

Here’s a comprehensive one from Rivendell Bike Works.

Here’s one from SKS themselves.

Basically you will want to approach the install in the correct order, especially for the rear fender. It is meant to be anchored in six places: the chainstay bridge, the brake bridge, and then two points each for the left and right stays. Adding complication is that while the TCX SLR 2 has fender eyelets for the stays, it has neither of the two bridges, as it is a cyclocross bike equipped with disc brakes and designed for mud clearance. Conventionally you will want to anchor the rear fender by the bridge piece and chainstay bridge before having anything to do with the stays. For the TCX, I did this by repurposing a reflector mount and using some long zip ties.

In a former life, this plastic piece used to mount my rear reflector. Now it holds the rear fender’s sliding bridge in place.

The biggest headache you will likely encounter during installation is the proper sizing and cutting of the stays. Keep in mind the old adage “measure twice, cut once,” as it can be very easy to cut too much off the stays, leaving  you with no way to vertically locate the huge fenders properly – unless you braze or weld the cut pieces back on.

Zip ties: they can fix almost everything on a bike. Here they are providing a mounting point near the seat tube, in lieu of a chainstay bridge.

…AND FINE-TUNING

Dialing in the fitment also happened in the first week post-install. On a disc-brake bike, you will definitely have to bend the stays inward. On the front fender, the bend is on the non-drive side to clear the disc caliper, while on the rear fender you will have to bend on the drive side to clear the cassette and freehub. The aim is to get the fenders as straight as they can, and eliminate any chance of the fender hardware rubbing on the spinning tire. Maintaining a one-finger-width gap from the stay to the tire will do.

This is how you fine-tune the fender gap and centering. The end of each stay is fixed by a special bolt, which threads into this hex nut right here. Loosening the nut allows the fender to slide up and down along the length of the stay, as far as the black end-cap will allow.

Lastly, you will want to reduce the fender gap to the slimmest possible without the tire rubbing on the inside of the fender. This is especially true for the front. If the gap is too large, riding the bike one-handed at higher speeds feels as if there is a parachute strapped to the fork and the winds are snatching the steering away from you. That extra-long front mudflap can also jack-knife on itself and fold over, rubbing on the spinning front tire and having a lot of its thickness filed down very quickly. Reducing the gap mitigates this.

PERFORMANCE IMPRESSIONS

After the frustration of installation, fine-tuning and adjustment, the SKS P45 Longboards are a great fender set.

P1250020_zps6621f88c
The TCX SLR 2 now sporting its SKS Longboards on the original 700x35c Schwalbe Super Swan mud tires.

That low-hanging front mudflap might look odd, but it’s quite effective at keeping the spray out of your feet and toes. It’s also soft enough to bend out of the way in case you have to push the bike through a doorway with a raised step. Not even the front fender on my Vitesse was this good – it just doesn’t reach as low. It is worth all the effort to get the fender hugging the front wheel as snugly as possible.

With fenders cinched up and rubbing eliminated, the bike has no trouble hitting 47 km/h of flat sprint, and it’s stable riding one-handed.

Coverage of the rear fender. Riders will have no complaints following you down a wet road, since the fender contains most of the spray off the rear tire.

As good as the front fender is, the rear fender was the primary reason why I bought this set. My clothes and backpack now remain dry and grime-free whenever I ride through lots of standing water or a rain shower. The half-moon arc also effectively protects my front derailleur and crankset from road grime.

The Secu-Clip stay system on the front fender. I tried pulling the stays out of the Secu-Clips manually before installing them to the fork, and they didn’t release. There’s just enough movement in there to suggest that they’re supposed to come apart.

One final selling point of the Longboards for me was their color. Fitted correctly, black fenders on a black bike are virtually invisible – only the stays and a few dots of chrome give them away. SKS also makes these in silver and beige, all with black rubber mudflaps.

The TCX SLR 2 in street commuter trim and 700x28c Specialized Espoir Sport slicks. Perhaps a little less sexy than before, but way more functional. There’s some fender gap left to trim down in the front.

P45 LONGBOARDS: YEA OR NAY?

The installation is the only thing frustrating about this product, and you just have to accept that the procedure will vary depending on the idiosyncrasies of your bike. If you can wrap your head around the install and fine-tuning, these are simply excellent fenders.

VERDICT

Highly recommended if you can find a set. Just take your time and be patient with the install and fine-tuning.

Review: Minoura DS-30AL bicycle display stand

I like wrenching on my own bikes. Often, the challenge with working on a bicycle is actually holding the thing upright while you do your thing.

A Park Tool PCS-10 clamping workstand for bicycles. The clamp head is holding up the bike on its seatpost. Image courtesy of BikeRadar.com.

I used to prop the bicycle with one of my arms or hands while I had my Allen wrench in the other…not exactly ideal. This is why a workstand is so helpful. These devices clamp onto the seat tube or top tube and suspend the bike in mid-air, freeing both your hands for the actual dirty work. Unfortunately, most clamping workstands are also expensive, with many models costing around PhP10,000 on their own.

DIY bike mechanics need not fret, however. Most of the jobs on a bike require a stable way of lifting the rear wheel clear off the ground, from my experience. I came across Minoura’s DS-30AL display stand, which does exactly that.

The Minoura DS-30AL display stand in folded form. Note that the stand’s tubes are naturally bowed inward due to an innate leaf spring effect.

SPECIFICATIONS

  • Made in Japan
  • Made of lightweight aluminum alloy tubing and ABS plastic
  • Accommodates both 130 and 135mm hub widths
  • Accommodates most quick releases except Campagnolo and Fulcrum
  • Two locking height positions can accommodate 18″, 20″, 26″ and 29″/700C wheels
  • Simple operation
  • Folds flat when not in use
  • Weight: 420g

OPERATION

The DS-30AL is basically a pair of roughly U-shaped aluminum alloy tubes joined by two tough ABS plastic pivots. One pivot has a round cup, while the other pivot has a slotted cup. The round cup fits over the adjustment nut for the quick-release skewer like a sleeve, while the slotted cup accepts the other end with the quick-release lever.

The slotted cup. This end pivot is meant to cradle the quick-release lever.
The round cup. This pivot end is meant to go over the adjustment nut on a quick-release skewer.

The round cup end pivot has two notches. The notch closer to the default folded or “center” setting is the height for 26″ and 29″ mountain bikes and 700C road bikes. The other is the height for 18″ and 20″ bikes – a common size for folding bikes and mini velos.

These are the two notches for setting the height. The one closer to the center is the taller setting for a full-sized bike with wheels of 26″, 29″ and 700C size. It would likely work with a 650B MTB wheel too. The notch farther from the center is for small-wheeled 18″ or 20″ bikes.
The taller height for 26″, 650B, 29″ and 700C wheels.
The shorter, squatter height for 18″ and 20″ mini velos and folding bikes.

With a bit of finagling (there is no owner’s manual or instruction booklet), I figured out that the best way of getting both cups onto the ends of the rear axle is to do it while the alloy tubes are hanging off behind the rear wheel. The U-shaped tubes have a “leaf spring” effect, which you will have to counteract while clamping them onto the ends of the rear axle.

Once the cups are in place, the same leaf spring effect keeps them secure. You then open up the U-shaped tubes along their pivots to either of the notches for the desired height setting, then turn the entire assembly downward so that the tubes now support and lift the bike’s rear wheel. You will want to position the rear quick-release lever in a vertical position for best results, as the slotted cup tends to pop out if the lever is oriented horizontally – and may hit the center of your rear brake rotor.

The DS-30AL in action, propping up my Dahon Vitesse T10.
The DS-30AL provides about 5-6 cm of rear wheel lift on a 20″ folding bike.

Used with care, the result is a very useful yet inexpensive “workstand” equivalent that will help in a lot of DIY bicycle maintenance and adjustment jobs. I’ve used the DS-30AL for rear and front derailleur cable tension and indexing adjustment, cleaning and lubing a chain, checking the rear tire for debris and cuts, and disc and rim brake adjustment. It’s a good workstand equivalent for these jobs because it raises the rear wheel of my 9kg TCX SLR 2 a good couple of centimeters, and my 13kg Vitesse T10 even higher – perfect for spinning the cranks and performing test shifts. Once done, just fold it flat and hide it away in a cranny or load it in your car.

The only improvements I can suggest to Minoura are to provide a set of hard rubber sleeves for the bottoms of the tubes. When used on a polished floor and while spinning the cranks on a lifted bike, the stand tends to slip a little. For heavier bikes, Minoura makes a heavy-duty steel version, the DS-80.

Used on my Giant TCX SLR 2, the DS-30AL provides 2 cm of stable rear-wheel lift.

Best of all, it won’t put a dent in your finances the same way a real workstand will. I got the DS-30AL for just under PhP700. At that price, you’re getting a dependable addition to your tool cabinet. With the help of YouTube videos, some practice, mechanical sympathy, and a small complement of tools, just about anybody can perform do-it-yourself maintenance, adjustments and repairs on a bicycle.

VERDICT

Highly recommended for the budding bike mechanic, and recommended for just about everyone else.

Cyclocross, commuting and TypeVertigo’s 2014 Giant TCX SLR 2

Riding my Vitesse T10 day in and day out led me to a few realizations on what I wanted out of a bicycle. The little blue Dahon is a great machine, but not without flaws – many of which are just inherent to the small 20″ (406mm) wheel size and the folding bike form factor.

After lots of contemplation and study, I realized I wanted a cyclocross bike.

Mud, drop handlebars, running, and flying remounts – this is cyclocross. Photo from cxmagazine.com.

WHAT IS CYCLOCROSS?

For the uninitiated, cyclocross (or “CX” for short) is a sport originally meant to keep competitive road bike riders busy in the off-season cold of winter – but quickly developed into its own discipline. CX riders race their bikes in varying terrains normally unsuitable for a road bike, such as mud, snow, sand and gravel, so they run wider tires than road bikes do. The mud can clog up the caliper brakes on a normal road bike, so they run cantilevers instead. Riders may even have to dismount and shoulder their bikes while running and jumping over obstacles they can’t ride through, such as stairs and logs. Despite rising to popularity fairly recently in the Philippines, as a competitive discipline CX is much older than mountain biking (MTB).

Rider Don Myrah shouldering his cyclocross bike as he runs across a log. The rider behind him is in the middle of a running dismount. Photo courtesy of cxmagazine.com.

In 2010, competitive cycling’s governing body, the UCI, formally accepted the use of disc brakes for the unique demands of cyclocross. Normally the preserve of mountain bikes, this meant that dependable all-weather stopping power was now in reach for people who didn’t want MTBs, and served as impetus for mainstream road bikes to get their own disc brakes in the next three years.

A shot from the 2013 Cyclocross World Championship Masters men’s event. Notice the brakes on these two bikes – the left one uses cantilevers, while the yellow bike on the right has discs. Photo from cxmagazine.com.

Still confused? Here’s a video to show it all in motion.

CX = COMMUTER?

For the average Juan and Juana, a cyclocross bike can make sense as an all-weather commuter bicycle. The classic mile-munching road bike position is altered just slightly, with more relaxed geometry and a taller head tube made for greater comfort over long rides, and the large 700c wheels make for efficient progress and a higher speed range. However, they detract from the cut-and-thrust agility of a small-wheeled folding bike or mini velo, which is useful in urban gridlock.

A disc-equipped Surly Straggler fitted with a rack, full-length fenders and a front dynamo hub. Photo from joe-bike.com.

With disc brakes, a CX rider does not lose braking power when it rains or when the rims get wet. While made tougher than a road bike, a cyclocross bike doesn’t carry the added weight of a MTB and its suspension. Many CX bikes have eyelets for racks and fenders, both for loaded touring and to keep a rider and the bike’s drivetrain safe from dirty standing water.

Lastly, the wider tire fitment allows riders to run a little less air pressure for more ride comfort. Wider rubber is also a good fit for the bad potholes, ruts and road acne that characterize the typical Philippine urban street. With proper tire choice, fire roads and light trails aren’t off-limits either. In better conditions, traditional thin-width road bike tires can be fitted on a CX bike if the rider chooses.

CHOICES, CHOICES

As with many major things we plan to buy, we all have non-negotiables. Mine were disc brakes and mounts/eyelets for racks and fenders, and it had to be either a cyclocross bike, or an “endurance” road bike with the relaxed geometry to ride long-distance sportives or gran fondos in comfort.

My original choice was a Jamis Nova Sport, with a Claris drivetrain, Tektro Lyra disc brakes, and classic CX top-tube cable routing. Great value, but I waited for months in vain for stocks to arrive. Photo from cxmagazine.com.

The relative novelty of CX bikes in the Philippine context means building one from scratch isn’t the best way to go – especially since disc brake options for road bike levers are few and far between in the aftermarket. The best-known of these is Avid’s single-piston BB7, available in both Road and Mountain versions, differing in cosmetics and cable-pull ratio.

Initially I was keen on relatively inexpensive built-bike options that had 8-speed drivetrains, such as the Jamis Nova Sport, thinking that upgrading cogs would be easier than the braking system. Unfortunately, none of them were in stock – even after months of waiting.

A Giant Anyroad 1. This was attractive because of the good stock spec: Avid BB7 brakes, a wide-range Tiagra-class 2×10 drivetrain, and those uniquely shaped interrupter brake levers on the bar tops. Sadly I couldn’t get one in my size with this spec. The best I saw were Anyroad 2s in a size too small for me.

Moving up a notch on the pricing ladder meant bikes with 9- and 10-speed drivetrains. I had my sights on Giant’s Anyroad gravel racer, willing to give up a second bottle mount and awkward rack mounting for BB7 brakes and a drivetrain revolving around Tiagra-class parts and a Deore XT 11-34T MTB cassette. Disappointingly however, there was no stock of the bike in my size and desired spec.

The Orbea Avant H10D. Very good spec, but just a smidge too expensive – even in frameset form.

Spanish bike maker Orbea also popped up in my radar with their Avant H10D. TriSwimBikeRun is the closest local bike shop to where I live and they happen to sell Orbea bikes. The Avant is their endurance road bike model, and the aluminum-framed H10D variant is equipped from the factory with Shimano BR-R317 road mechanical disc brakes – very rarely seen on the aftermarket. Alas, while the cleverly hidden fender and rack mounts increase utility, the Avant H10D was priced a little out of my budget, limited to 28mm-width tires, and designed a little too cleverly.

AND THEN…

LifeCycle then offered me the Giant TCX SLR 2. At a slight premium over the Anyroad, it had everything I wanted, and then some. The componentry this bike came with beat out the Orbea Avant H10D’s, and pretty much future-proofed it for me.

Straight out of the box.
Rear non-drive side chainstay with TRP’s Spyre twin-piston mechanical disc brake caliper. Older single-piston designs such as Avid’s BB7 and Shimano’s BR-R317 push and bend the rotor toward an inboard “fixed piston.” You can see the rack eyelet on the right.
Mang Boy of LifeCycle Makati performing final assembly. Gotta like his workstand!
Shimano 105 FD-5700-F braze-on front derailleur.
FSA Omega 46-36T double crankset spinning within a BB86 press-fit MegaExo bottom bracket.
Shimano 105 RD-5700-SS rear derailleur mated to a Tiagra CS-4600 12-30T cassette. I have the exact same cassette on my Vitesse.
A look at the inboard side of the TRP Spyre front brake caliper. Pad spacing is adjustable on both sides.
Official UCI clearance stamp for cyclocross racing above the Giant spec and size decals.
A decent saddle made for Giant by Velo. A white saddle on a CX bike? It looks nice, but I wonder what they’re smoking over at the factory in Taichung…
Shimano 105 ST-5700 STI lever for the rear shifting and brakes mounted on a Giant Sport anatomic drop handlebar.
My cockpit. Yes, Giant throws in a dinky little bell and front reflector. Yes, that’s white bar tape on a CX bike. Yes, it gets dirty quickly. No, I don’t know what they smoke at the Taichung factory. 🙂
Front fork and handlebar.
Presenting my TCX SLR 2 in commuter duds with lights on. No rack and fenders yet, though. Check out the U-lock “mounting.”
Lights off, and with one f-stop worth’s light over the previous photo.
“Crouching Dahon, hidden roadie”

RETURN TO FORM

It had been almost 15 years since I last rode a road bike and it took some patience to get used to the sleek riding position again. Once I did, though, the TCX came alive. The frame has both light weight and stiffness, harnessing all my pedaling power without flexing or creaking, while the carbon-fiber fork and seatpost take the sting out of Manila’s pockmarked roads. Shimano 105 STI levers and derailleurs smartly shove the KMC X10 chain across a familiar Tiagra 12-30T cassette and an FSA Omega 46-36T double crankset. Best of all, the TCX came with TRP’s twin-piston Spyre calipers – arguably the best mechanical disc brakes around. All of this rode on Giant S-X2 wheels shod with bespoke knobbly Schwalbe rubber. I thought the Anyroad 1 looked handsome in its gray and blue, but heck, the TCX SLR 2’s stealthy gloss black finish with red and white accents is pretty damn good too.

Cockpit pieces may get swapped out as I go, but mechanically speaking there is practically nothing left to upgrade on the TCX. All it needs is a rear rack and full-length fenders.

Checking the bike fit on the TCX while riding on the hoods. From what I’ve studied on road bike fit, the frame is correctly sized for my body. Any adjustments afterward will be minute tweaks.
Maximum leg extension. Looks like saddle height’s fine
I repurposed a few decals that came with my Fox helmet to personalize the TCX and make it my own without overdoing it. This one is on the top tube.
Another decal on the fork blade where the speed sensor is. I like how this one fits.
A last decal on the seatpost. This is a handy way of marking the saddle height too.
I took it on a 41.3-kilometer ride around Daang Hari and Daang Reyna and it felt great. Some cockpit aspects could be improved, but this is a good start.

Since taking delivery of the bike, I’ve taken it on quite a few long rides and logged 280 kilometers on it pretty quickly. It’s a fun machine to punt around, and definitely a contender for a road bike that will do almost everything you ask. The price may be a little steep, but you’re also getting a whole lot of bike for the money and it’s a great all-rounder. The Giant TCX SLR 2 just might be all the bike you need…I know it’s the last bike I’ll be buying for a good long while.

It didn’t take long for me to take the bike out on my longest ride yet.

Thanks for viewing!

===

SPECIFICATIONS_
2014 GIANT TCX SLR 2 

FRAME

  • Size S, 50cm
  • Giant Aluxx SLR triple-butted 6011A aluminum alloy frame, internal cable routing, BB86 bottom bracket
  • Integrated seatpost clamp with included rack adapter
  • Carbon-fiber composite fork, OverDrive 2 aluminum steerer tube

DRIVETRAIN

  • KMC X10 10-speed chain with Missing Link 10R
  • FSA Omega 46-36T double crankset, 170mm crank arms
  • FSA MegaExo press-fit bottom bracket (BB86)
  • Shimano Tiagra CS-4600 10-speed cassette sprocket, 12-30T
  • Shimano 105 ST-5700 STI 2×10 brifters, Lodestar Black
  • Shimano 105 FD-5700-F front derailleur, braze-on mount
  • Shimano 105 RD-5701-SS short-cage rear derailleur, Lodestar Black

ROLLING STOCK

  • Giant S-X2 wheelset
    • Giant S-X2 rims
    • Giant Tracker Sport hubs, 6-bolt disc mount, 100mm F/135mm R
    • 9mm quick-release skewers
    • Stainless steel 14G spokes x28 per wheel
  • Schwalbe Super Swan knobby tires, 700x35c (ETRTO 35×622)

BRAKES

  • TRP Spyre double-piston mechanical disc brakes
  • TRP 160mm rotors F and R
  • TRP semi-metallic pads, Shimano BR-M515 compatible

COCKPIT

  • Giant Performance Men’s saddle by Velo
  • Giant D-Fuse SL carbon-fiber seatpost
  • Giant Sport handlebar, 31.8mm x 400mm x 140mm, anatomic drop
  • Giant Sport stem, 90mm
  • Dartmoor Cookie flat plastic pedals
  • Giant Sport bell

LIGHTING

  • Cat Eye Volt 1200 HL-EL1000RC front light
  • Cat Eye Omni 5 TL-LD155R safety light
  • Cat Eye TL-LD170R safety light

OTHERS

  • Lezyne Power Cage bottle cage
  • Topeak MonoCage CX bottle cage
  • Deuter Bike Bag II saddle bag