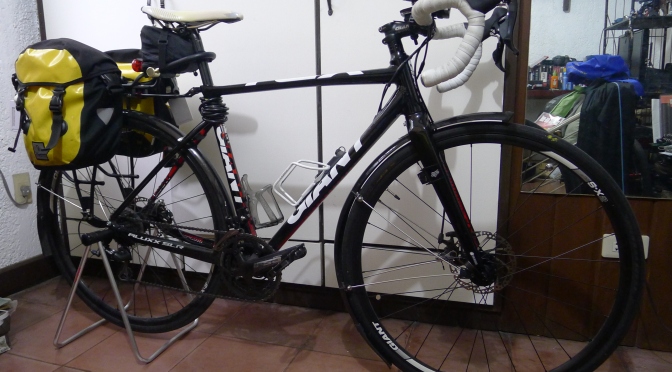
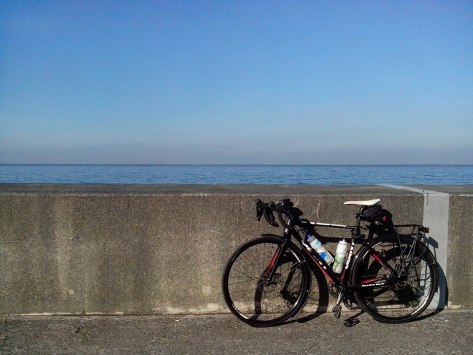
When I got the TCX SLR 2, I stated it doesn’t need upgrades other than a set of fenders and a rear rack. Unfortunately, these two items are very hard to find locally. Whenever people talk about racks for bikes, 95% of the time they refer to contraptions to hang them on a vehicle. Seldom do they think of an apparatus to help a rider carry his/her loads.
CAST YOUR BURDENS UPON THE BIKE
One reason why bike touring enthusiasts are able to pedal very long distances is because they let their bikes do their load lugging for them. Freeing the body from all burdens other than pedaling increases long-term endurance and comfort. This also benefits handling, as the center of gravity is much lower with a rack and panniers compared to carrying your load on a backpack. To do this, they invest in bike frames that accept the installation of racks – usually at the rear, but sometimes even at the front as well. This is usually done via threaded holes, called “eyelets,” found somewhere on the rear triangle. For rugged touring bike framesets that can carry a front rack, the fork legs will also sport eyelets.
With the right frame as the basis, the next step is to look for suitable racks to hang your panniers from.
Bicycles with disc brakes pose a peculiar dilemma when installing a rear rack. Most rear racks have a lower mount meant to mate with frame eyelets close to the dropout area. If the disc brake caliper is mounted on the seatstay, outside the rear triangle, mounting a rear rack becomes a more complicated affair as the rack’s lower mount has to clear the caliper somehow. To address this, rack makers have released products that are specifically meant to mount on frames that use disc brakes.

Many newer disc-brake road bikes mount their brake calipers inside the rear triangle, on the chainstay. This improves compatibility with rear racks and reduces the fuss of installation. The TCX SLR 2 is one of these bikes; in fact, this was one of my main criteria in selecting it.
After reading a few reviews, I decided on the Axiom Streamliner Disc DLX rear rack. This is a 700g aluminum unit painted in matte black, rated for a maximum load of 50 kg (~110 lb). Unique to the Streamliner series are curved lower mount feet, which set the legs backward to increase heel clearance from pedal to pannier while pedaling. Incidentally, this feature also helps clearance from a seatstay-mounted disc brake caliper. The upper mount arms are also length-adjustable. Lastly, Axiom makes a big deal of how the Streamliner racks are more aerodynamic, with sides that taper toward the top, in an effort to bring the mounted panniers closer to the center line of the bike and reduce the frontal area. However, this tapering isn’t so noticeable on the Disc version.
INSTALLATION
Unlike the fiddly installation of the fenders, installing the rack was mostly hassle-free and straightforward. By comparison, the TCX SLR 2 is much better equipped to accept a rear rack. Both can share the same pair of eyelets down by the rear dropouts. All you will need are slightly longer bolts to ensure at least three turns’ worth of screw thread is left exposed through the eyelets, and washers to ensure the exposed bolt ends do not interfere with the chain in the smallest cog.


To mount the rack’s upper arms, Giant bundles a block adapter, cylindrical washers, and longer hex bolts for the seatpost clamp plate within the TCX SLR 2’s build kit. You remove the normal hex bolts on the seatpost clamp plate, then thread the longer bolts though the block adapter, cylindrical washers and seatpost clamp plate as you torque them into the bike’s top tube. The block adapter will provide the mount points for the rack’s upper arms. This is a neat solution, and you could easily run the bike with its rack removed, but the adapter block left attached.


Axiom’s build kit is comprehensive, coming with all the bolts and hardware you’ll need. I do question, though, the use of fragile 3mm hex bolts on the upper mounts, and needing 4mm and 5mm wrenches to adjust the telescoping length. I feel they would have been better off with using 4mm for everything, but it is what it is, I guess. The mounting is as simple as can be; I went into the install blind and the process went very smoothly. In operation, the Streamliner does its job without fuss, although daily use of the rack and any panniers you mount does scuff and scrape the matte black paint away, exposing the shiny aluminum underneath. That’s to be expected, as the pannier hooks will leave their mark. All things considered, the Canadian outfit deserves a medal.
BUT WAIT, THERE’S MORE
Like most other racks, the Streamliner unit has a mount plate for a rear safety light. I decided to mount a Cat Eye Reflex Auto TL-LD570R unit back there, which is both a standalone reflector and an automatically activated rear safety light. When the switch is set to its “active” mode, it turns on automatically by input from a light sensor and a motion sensor, and will turn itself off after thirty seconds of inactivity. This is a great idea, as with a simple modification, you could ride knowing that you always have a rear light working to keep you seen by other road users.


The only modification I needed is to disable the light sensor, by covering it with some electrical tape while the light body is open. This “blinds” the light sensor, and effectively turns the safety light on with only a shake or movement of the bike.
As a safety light, the Reflex Auto isn’t too shabby either. It offers five different modes:
- random strobe 1
- random strobe 2
- pulse glow
- regular flash strobe
- steady glow

Of all the modes I make use of the pulse and steady glow ones the most. I have two other safety lights so I relegate those for flashing purposes. This functionality is helped by the sheer size of the light unit; you effectively have a palm-sized red rectangle on your bike when it’s on, visibility is good even on the sides, and it doesn’t have to resort to obnoxiously bright LEDs to get you noticed by other road users. A sexy tail light it ain’t, but it’s one of the better-thought -out ones.
With this, my Giant TCX SLR 2 “all-weather commuter bike” project is mostly complete. I can think of only a few things left to change out or “upgrade” on the bike, and those are for comfort or maintenance/maintainability purposes.


Hi sir, saan nyo nabili yung rear rack? And magkano?
I bought it on eBay from a US-based retail seller. The rack amounted to PhP2200, plus shipping.
I couldn’t get the mounts to attach to the extra piece that Giant give you (I also have the same bike). The holes wouldn’t align as there is too much metal past the eyelet on the strut if you see what I mean – did you have this issue?
I think I see what you mean. I didn’t run into that problem, however. The “excess” metal on my rack’s struts fit nicely into the hex key heads of the bike’s seatpost clamp bolts, so that allowed me to thread the horizontal bolts through the struts and into the adapter.
If that doesn’t work, you could take a file and whittle down the excess metal on the strut to make it fit. I hope this helps. Thanks for reading!
Great review! Any issues with rack flexing? I know some have voiced this concern with the pannier center being so far back from the center of the wheel axle.
I want to use this rack on a cyclocross bike I commute on and sometimes do light touring. Not extremely heavy loads, but I do sometimes have dual Orlieb Classic panniers with both loaded full of groceries.
I have the Streamliner Road on a SS commuter and have never had flex/lateral sway issues, but I rarely carry heavy loads. Thanks!
Ron in the U.S.
Hmmm. My TCX has no seat stay bridge, which aids comfort, but can lead to some twisting when riding with heavy loads. I did ferry a couple of 10 kg sacks of tube ice in my panniers one time, probably the heaviest load I’ve ever carried, and felt a lack of stiffness at the back over the short distance I pedaled. Because of the bridgeless frame design, it’s hard to say if the flexion is coming from the rack or the frame itself.
For more usual loads though, the whole system is as stiff as most would like. I’ve ferried a heavy ThinkPad T430 laptop along with my own usual everyday carry load, and I had no problems. I hope this helps.