The do-it-yourself bike wash and maintenance job

One of the great things about owning a bicycle is that, as far as machines go, maintenance is fairly simple and straightforward. In general, a bicycle runs happiest and best when it is clean.

Everyone has their own way of washing their bikes, but it’s important that you do it regularly. This is especially important for mountain bikers who hit the trails, and those of us who ride in the wet. Today, I’ll show you how I do it.

Some of the tools and supplies I use. A toothbrush, a stiff-bristle scrub brush, a Finish Line chain cleaner, a garden hose and some dishwashing liquid.

TOOLS AND SUPPLIES

  • Degreaser or dishwashing soap
  • A bucket and a water dipper (tabo) of warm water
  • A water hose
  • Old toothbrushes and/or finger-sized bottle brushes
  • Stiff-bristled brushes
  • Your choice of wet or dry chain lubricant
  • Rags
  • An old wash mitt
  • A flat-head screwdriver (optional)
  • A chain cleaner (optional)
  • A stand or workstand (optional but highly recommended)

PREPARATION STEPS

The first thing to do is to strip the accessories from your bike – usually removable lights, mini-pump, locks, cyclocomputer and water bottles. They’ll just get in the way, and you don’t want these getting wet with soapy water because soap tends to defeat waterproofing. Soap makes water more slippery – it’s how it does its job.

My Giant TCX SLR 2 in commuter trim prior to washing.
Removed: My front and rear lights, cyclocomputer, locks, mini pump, saddlebag and water bottle (I normally carry two of them).
The same bike stripped of almost all its accessories. The rack-mounted reflector/auto rear light is screwed in. Removing the bottle cages, fenders and rear rack means greasing the mounting bolts when you reattach them. I have no problem leaving them on.

Another prep step unique to bikes with disc brakes is putting on plastic bags over the brake calipers and rotors, or removing the wheels. This is to minimize the chances of contaminating the rotors or brake pads with oil, either from chain lube or the oils on your skin. Contamination reduces the effectiveness of brakes and can make them noisy. You can clean out rotors with brake cleaner or isopropyl alcohol, but contaminated pads have to be replaced.

The rear caliper and rotor wrapped up.
The front rotor and caliper wrapped up.

WHY WASH THE DRIVETRAIN FIRST?

Most bicycles have a chain transmitting pedaling power from the pedals and chainrings to the rear wheel via one or more cogs or sprockets. With multiple cogs, derailleurs or mechs push the chain sideways to switch between them. These “guts” of the bike are exposed to the elements and end up becoming the dirtiest bits, which is why you have to wash them first.

The chain contains lubricant or oil, which enables the pins and rollers in the links to do their job, but also attracts dirt and grit over time. The dirt acts like sandpaper, wearing away at the chain’s rollers and causing “chain stretch.” Some chain stretch over time is normal, and manufacturers recommend replacing the chain after a while. If you continue using the stretched chain, it will deform the flat teeth on the cogs and chainrings, wearing them away into sharp and pointy shark-tooth shapes that will result in skipping and loss of drive. When this happens, you have no choice but to replace the whole drivetrain – not just the chain. That’s a minor shame, considering that a typical cassette should last around three chains’ worth of wear – with the chainrings lasting much longer.

If you have a KMC Missing Link or some other removable link, you can use that to remove and reattach the chain for cleaning. In my experience though, they tend to become loose after about 10 disconnect-reconnect cycles – and if you’re not careful it’s easy to lose the Missing Link itself.

Another look at the chain cleaner. It’s made up of three rotating brushes, the center one located in the top cover to sandwich the chain. At the end are scrub plates to clean the side plates of the chain links.

These days, I prefer cleaning the chain without removing it from the bike. To do that, I use a Finish Line chain cleaner, which I bought from my Japan trip earlier this year. This useful device has a small tank for degreaser, three rotating brushes, scrub plates, and a magnet at the bottom to attract bits of worn chain.

My chain cleaner opened up to accept the dirty chain above.
On the side of the chain cleaner is the fill line. Here you can see I overfilled it a little with water and dishwashing liquid – the point is to make sure the brushes are soaked in the stuff. The black plate under the handle is the magnet. Take note of how clean the solution is here.

You start by filling the chain cleaner with your preferred degreaser. For most cases, dishwashing liquid will work. If what you use is thick and viscous, you’ll want to dilute it; I make a solution of one part of my thick dishwashing liquid in three parts water. The chain cleaner will have a fill line on its side; fill up to this level.

“Tout adroit” is cycling slang for a maximum speed sprint – it’s French for “all to the right,” signifying the use of the smallest cog and largest chainring (effectively top gear). When using a chain cleaner, I do the same to move the chain as free of the wheel as possible.

Next, shift to your smallest cog and largest chainring to push the chain as far right as it will go. Hook the chain cleaner over the chain and snap it closed. Hold the chain cleaner right up to the cage of the rear derailleur, then turn the cranks backward for 60-90 rotations. (If you don’t have a chain cleaner, you can use two toothbrushes held in a pincer formation as they pinch the chain.)

Ninety crank rotations later…
…the solution in the chain cleaner has darkened considerably. That’s all the grit, dirt and old lube from the chain. Riding in the wet increases all that.

With a thick degreaser diluted in water, as above, you can really see the chain cleaner doing its work. The chain will slowly foam up as the degreaser is agitated by the brushes, which clean the chain along with the scrub plates. Any metallic dirt it removes from the chain, it will hold on to using its magnet. Try to hold the chain cleaner steady, as pushing it side to side (like a manual derailleur of sorts) can lead to a dropped chain.

It’s a little fuzzy but the black dotted residue in the middle is all the metallic bits of dust, grit and worn chain. The chain cleaner’s magnet holds on to them and keeps them away from the chain as it cleans, preventing their especially abrasive wear.

After 90 crank rotations, check the chain. If it’s especially dirty, it may need another round with the chain cleaner. Drain the chain cleaner, fill it up with fresh degreaser solution, then repeat until the chain is sparkling clean.

CLEANING THE CASSETTE

We now move on to the cassette. Your chain should still be in the smallest cog at this point. Break out your stiff-bristled brush, dip it into your water dipper (tabo) of soapy water, and press its bristles up against the cassette longitudinally.

Get a water dipper (tabo) and pour some dishwashing liquid into it. Foam it up with the water jet of the hose. You’ll need the stiff-bristle scrub brush too.
Press the bristles of your soaped-up scrub brush into the cassette and turn the cranks forward. Make sure you keep your fingers clear of the spokes. This quickly cleans the cassette.

With your other hand, turn the cranks forward – while being careful not to snag your brush hand’s fingers or knuckles on the rotating spokes. This will spin the cassette, and with every rotation the stiff-bristled brush will scrub the cogs and the gaps in between. If you backpedal on the crank like you did with the chain cleaner, the cassette won’t spin because of the drag from the brush.

Shift to the other end of the cassette to get the chain out of the way and clean the smallest cogs.

Continue doing this, dipping into the soapy water every so often. Repeat this process after shifting to the largest cog, so that you can scrub the smallest cog of its dirt too. Your cassette will be clean before you know it.

Clean cassette!

SCRUBBING THEM CHAINRINGS

Once done with the cassette, shift to a middle cog to prepare for chainring and crankset cleaning. Cleaning the chainrings is a simpler affair; all you really have to do is target the teeth and the shift ramps and pins behind the middle and large chainrings.

Scrubbing away at the big chainring.
Make sure you hit the underside of the chainrings as these contain the shifting ramps and pins. Keeping these clean improves your bike’s front shifting.

To ensure a thorough clean, shift up and down the chainrings as necessary and scrub away.

Here the chain is on the small ring, so we can clean out the teeth of the big ring.
More cleaning of the shifting ramps and pins. Safety goggles might be a good idea at this point.

Clean your cranks and pedals at this point too. If you have clipless pedals on your bike, make sure you target the retention mechanism and springs.

Shimano’s Saint PD-MX80 pedals have screwed-in traction pins to bite into your shoes’ soles in case of mud. They can get muck gummed up into their screw threads, so they benefit from scrubbing too.

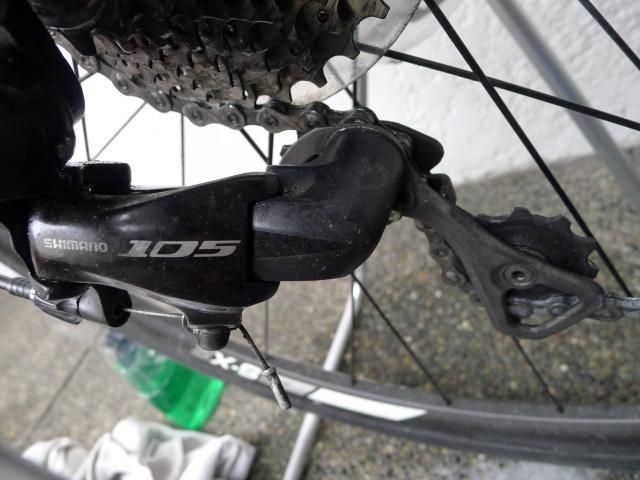
DON’T FORGET YOUR DERAILLEURS

Set aside the big brush for now, and get your toothbrush and other fine brushes. Derailleurs are intricate little things and need a little more dexterity to clean.

The most important bits to clean are the pivot joints where the derailleurs move when shifting. These parts are usually lubricated, which means they can also attract dirt and give you lousy shifting when left alone for too long.

A fairly dirty rear Shimano 105 5700 rear derailleur that’s seen a number of wet rides.
Job 1 is cleaning the pivots. You need a toothbrush to get at them.
These are the pivots on the front derailleur. Again, a toothbrush is your friend.

The next bit to clean is the cage, which is pretty much 70% of your front derailleur. You can imagine it can get pretty grotty having to accept and push a dirty chain around. Keeping this clean means one less place for your chain to pick up dirt.

Clean that cage!
Even the lower portion of the front derailleur’s cage has to be cleaned too. Scrub at those side plates.

When you clean the rear derailleur, the main difference is that the little jockey wheels its cage contains can collect a lot of dirt. Scrub the pivots and cage as before, then take a toothbrush or a flat-head screwdriver and hold it next to the jockey wheels as you turn the cranks backward. This cleans all the surface grime.

The rear derailleur cage. The top jockey wheel (hidden here) is the guide pulley, while the bottom one is the tension pulley.
Holding a toothbrush to the jockey wheels and turning the cranks backward cleans off their surface grime.

Lastly, don’t forget the springs of the derailleurs themselves.

Just below the bristles is the knuckle spring of the rear derailleur. It’s worth keeping this clean too. The front derailleur has a similar spring.

CLEANING THE REST OF THE BIKE

Now that your drivetrain is sparkling clean, you’re halfway done with the job.

The hosedown. Avoid high pressure – that’ll cause you headaches later on

Get the hose and set it to a gentle spray of water to rinse off the dirt on the surfaces of the bike.  Avoid using a high-pressure jet of water, as the force can knock all the grease out of hubs, headsets and other parts that you want to keep running smoothly.

Take some dishwashing liquid, squirt it into a bucket, and shoot a jet of water into it…
…to foam it up
I use an old chenille wash mitt for general cleaning of the bike. This is easily found in the automotive section of hardware stores.

Once the bike is rinsed, it’s time to bring out the bucket of soapy water and the wash mitt. You want to work with gravity here, so begin washing from the front and top of the bike, then work your way downward and backward. This means washing the handlebars, stem or handlepost, saddle and seatpost first.

The saddle needs some love, too
Cleaning the handlebars, brake hoods and STI levers. If you have white bar tape, you’ll need to go over it with a scrub brush and some elbow grease to get it clean again.

If you have a road bike with white bar tape,  you’ll know that it gets dirty if you even just look at it the wrong way. Take a second clean scrub brush, apply some soapy water, then scrub away. With a little elbow grease, the bar tape will go most of the way back to its bright white (although it’ll never be truly as bright as it was originally).

WASH = INSPECTION

While washing, inspect the frame tubes for any discoloration, cracks or damage. This is the best time to do so since you’re up close and personal with the bike, and is all the more important if you have carbon fiber or composite parts like forks and seatposts – or, indeed, a carbon fiber frame.

The TCX SLR 2 has a carbon fiber fork – inspect it thoroughly every wash
Two fork blades = two inspection points
Even the TCX SLR 2’s beefy aluminum downtube can suffer cracking, so make sure you inspect while washing.

Do the same for your wheels and tires. Check for rips, tears and irregular wear as you wash. Check the spokes by hand for evenness of tension, and identify any loose spokes. If you have rim brakes, make sure you wash and clean the brake tracks on your wheels, and check for any pitting or signs that the wheel may be weakened at the brake track. If you have disc brakes, check the rotors for discoloration.

Clean and inspect the condition of your wheels and tires. Especially important if you run rim brakes
Clean the hub shells while you’re at it, too

Some of the dirtiest parts of the frame are the downtube, bottom bracket shell, cable guide, seat stays and chainstays. Make sure you reach them with at least one pass of soapy water.

Make gravity work for you by lathering up the junction of the seat tube and seat stays and squeezing the wash mitt. This sends foamy water down the tubes to push dirt away.
Back when I didn’t have fenders, the underside of the downtube got filthy very quickly in the wet
Chainstays are dirt magnets, especially when you get closer to their junction with the seat tube and bottom bracket shell
An often overlooked area
A lot of bikes have cable guides on the underside of their bottom bracket shells. Leave this dirty and your braking and shifting can suffer. The TCX SLR 2 doesn’t have this problem as its cables are internally routed and there’s no cable guide down there

After lathering up the bike, hose away with a gentle spray of water and dry off with your rags.

Rinse off the soap and foam with a gentle spray from the hose.
Wipe down with a rag.

Now you can put your accessories back onto your sparkling clean bike! If you’re so inclined, you could also wax the frame for more luster, as dishwashing liquid tends to strip any wax.

Now that’s a clean bike

THE HOME STRETCH: LUBRICATING THE CHAIN

It’s been a long post but the last thing you do at the end of a bike wash is to lubricate the chain. Break out your chain lube. There are dry lubes for general riding, and wet lubes for extra tenacity in wet conditions. Bear in mind that wet lubes also attract more dirt, more easily.

General riding calls for dry lubes. Not all of them are made the same, though. Zefal Bike Dry Lube, for example, is a very runny lightweight oil, while Finish Line Teflon Dry Lube is a slightly more viscous milky-white fluid that sticks to a chain better.
I use Tri-Flow Synthetic Soy Lube as a wet chain lube. It comes with a straw that comes in handy when applying to derailleur pivots.

Chain lube is best applied to each roller pin one at a time, and only on the inside of the chain – the side facing the teeth of the cogs, chainrings and jockey wheels. Putting it anywhere else on a chain is a waste of lube, and just increases the risk of splattering the lube on places on a bike where you don’t want it, such as rims’ braking tracks or disc brake rotors.

The way I do it is I pick out a fixed place on the chain where I can start and end my lube job. KMC Missing Links are ideal for this, since they are distinct from all other links on a chain.

Applying chain lube to a KMC Missing Link. As you can see, they’re shaped differently to the other links on the chain, so they make perfect fixed markers for where to start and end lubing.

You don’t really need all that much lube – any more just attracts more dirt quickly. All you want is a thin coat. Once all pins have been lubed, take a rag and wrap it around the chain while you turn the cranks backward. This removes excess lube.

Wipe off excess lube with a rag as you turn the cranks backward.

While you have your bottle of chain lube open, treat your derailleurs to fresh lube on the pivots and jockey wheels. This ensures they keep working properly. Perform a few test shifts to work the lube into the pivots, cassette and chainrings.

Put a drop of lube on the jockey wheels…
…and derailleur pivots.
Just a drop is enough, so wipe off the excess here too.

After all that, treat yourself to a shakedown ride. Congratulations!

My BGC Cycle Philippines 2014 experience

2013 marked the inaugural hosting of BGC Cycle Philippines, and I joined the 20-kilometer Community ride on my Vitesse. This year, with improved fitness, better endurance and a different bike, I decided to sign up for the 40-kilometer Challenge ride.

THE ROUTE

The route shared by the Community and Challenge rides of BGC Cycle Philippines 2014.

Perhaps due to logistical challenges, the event ride route is much more simplified this time around. From the start/finish gate at Bonifacio Global City’s 9th Avenue and 30th Street, riders make their way through some side streets before eventually climbing the Kalayaan flyover to Gil Puyat Avenue. Past the off-ramp, it is a straight shot all the way to the turn at J.W. Diokno Boulevard. Just before crossing the bridge, the route makes a U-turn and doubles back on itself returning to BGC.

The Community and Challenge rides share the same route, only differing in the number of laps. Community riders get one go-around, while Challenge riders lap it twice.

The 2013 BGC Cycle Philippines 20km Community Ride route. 40km Challenge riders kept on going along Gil Puyat Avenue toward Rizal Park.

All this is in contrast to last year’s event, where Kalayaan Avenue and the C5 leg from Pateros to Heritage Park played host to the 20km Community ride. Challenge riders didn’t make a U-turn at Gil Puyat-Paseo de Roxas, but rode on toward Rizal Park via Gil Puyat and Roxas Boulevard before heading back.

THE RIDE PACK

The ride pack for BGC Cycle Philippines 2014.

2013’s ride pack was an off-white canvas body bag with a wide strap and a side zip – very nice for riding. This year we have a knapsack with ropes in a drawstring closure. It’s more colorful, but also arguably less useful for a rider, especially when loaded up, where the weight will dig into a rider’s shoulders through the narrow ropes.

Number bib, helmet stickers, pins and waiver.

Inside the ride pack for Challenge riders are a bib number, pins, three helmet stickers, a seatpost sticker with timing chip, a waiver form, the event jersey, and a yellow-and-black Rudy Project sling bag.

The Rudy Project sling bag.

The sling bag is a little small. The straps are wide enough and offset to one side so it’s easy to ride with. The yellow top flap is made of the same PVC material as my waterproof Vincita panniers, but don’t expect waterproofing here as it doesn’t have a roll-top closure.

I may have found the ride pack a little underwhelming, but they massively improved the claim process this year. The Mind Museum hosted the registration and ride pack claiming, and the various steps were spread out across multiple areas of the venue spanning two floors. The event organizers had ushers stationed to ensure people didn’t get lost, and they retained the bike parking from last year.

It was such a pleasure and so well thought out that I was in and out within twenty minutes. This is in stark contrast to the adjoining function halls they used last year, which tried to squeeze everything in (even the sponsor booths!) and made for a frustrating queue. Well done, Sunrise Events.

Made by F2P, the BGC Cycle Philippines 2014 event jersey in its packaging.

THE EVENT JERSEY

I was not supposed to get a jersey last year because of my category, but out of curiosity I went ahead and bought the limited-edition 2013 BGC Cycle Philippines jersey anyway. Made in the Lao PDR by F2P, I got the XL size, and it served as my only jersey for an entire year. The size I got is aggressively cut and clings to every bulge of my physique – there’s absolutely no hiding my belly here!

Me wearing the 2013 BGC Cycle Philippines limited edition jersey.

I slowly got used to its clingy fit and appreciated the many added touches it has:

  • Silicone gripper tape on the rear hem
  • A zippered center pocket in addition to the three standard pockets
  • Reflective trim on the rear center zipper

Compared to this jersey, the 2014 event jersey feels like a step backward. It’s still got a full-length zipper, and I ordered a slightly larger XXL size which is a little more accommodating and flappy in the wind, but it lost all the features I listed above – which is a minor shame. Despite the more generous fit, oddly it’s less visually flattering because the belly area is white. Then again, I won’t say no to a proper cycling jersey, and F2P’s materials are still spot-on in terms of comfort and moisture wicking.

Me in the 2014 BGC Cycle Philippines event jersey.

THE RIDE

As part of Wave A, we set out at 6:05am. I had planned to take a relaxed pace and ride with my groupmates Ara, Jogh and Alex as much as possible. That plan lasted as long as the first climb up Kalayaan flyover. I tried stopping and waiting for them there, but promptly lost sight of them in the sea of similar jerseys when they passed me.

Wave A and B at the start line.

So on I rode, proceeding at “catch up” pace, trying to pass riders as safely as possible.

This is my only real complaint about events like BGC Cycle Philippines: we Pinoys don’t yet seem to have grasped the concept, dynamics and virtues of safe group riding, which apply even in pseudo-race or racing situations.

Despite the organizers telling the participants that this was not a race, that message was lost on most riders as they pedaled furiously out of the gate. Some even resorted to reckless maneuvers which might have led to crashes, and indeed two riders went down just after the first descent of Kalayaan flyover – and nobody else called out to the pack to inform about downed riders. Very few riders called out obstacles such as ruts and manholes to riders behind, too. Equally concerning was how ill-prepared many riders were to handle upcoming full-stop situations, such as the train crossing at PNR Gil Puyat Station, because they didn’t allow enough room for error.

Top whack achieved at the event, achieved on the downhill off-ramp of Kalayaan flyover. This is about as fast as my TCX SLR 2 will go, as the cyclocross gearing of the crank limits top speed but makes for more usable ratios for acceleration.

We had to compress into single file riding as we approached the Macapagal Boulevard intersection, filtering through two lanes of stopped cars. I was beginning to understand why the organizers had to simplify the route: there were a lot of agitated drivers. Even with advance notice of the road closures, the area is just too busy. Even with the simpler route, perhaps traffic rerouting should have been done to reduce the impact.

By the turnaround at J.W. Diokno Boulevard halfway through the first lap, lots of people lined up at the hydration station. It seemed these were the riders who went out too hard at the start, and went “into the red” (i.e. rode an unsustainable effort). Gradually, the pack started to thin out.

Riding back to BGC to finish the first lap, I was still feeling fresh. The eastward climb up Kalayaan flyover felt great, and it was a rush swooping down the right-hand turn at Rizal Drive riding in the drops immediately after the descent. From there, it was a U-turn at 3rd Avenue to climb back up Kalayaan flyover going west.

This was when I could really pour on the speed, as the path had largely cleared and I hit 55.6 km/h as the downhill off-ramp flattened into an open stretch of Gil Puyat Avenue. I was sustaining 48 km/h on these flats, already outspinning the TCX SLR 2’s 46×12 top gear, only stopping for the train crossing.

That’s me on the left with the yellow helmet and mudflaps on the bike.

By this time I was slightly worried about my groupmates, whom I had not found yet, but realized I now had to treat this as a solo ride. The second go-around at J.W. Diokno and return trip up to Kalayaan had me picking gaps and sprinting along the flats at full effort. As I approached the climb, I tried spinning up in an easier gear and high cadence, but got dropped by a couple of stronger climbers on 20″ folding bikes with really good technique.

Fifty meters from the finish, I dropped two cogs and tensed up my legs for a final spurt, but the exertion finally caught up with me as my right calf succumbed to cramps. I changed back to an easier gear and spun the cranks as efficiently as I can to avoid making the cramp worse – as I crossed the finish in high spirits.

Finishers’ area bike parking. Most participants brought road bikes, mountain bikes, folding bikes and mini velos to the event, although some riders brought bamboo bikes and fat bikes too.

POST-RIDE

At the finishers’ area there were a few beelines forming. The first of them was for claiming of the finisher’s medals, but the rest were for food and drink: Gatorade, Sausage McMuffins, a small serving of Jamba Juice, and even some free beer. The bike parking from the ride pack claiming period was back, so riders could rest easy.

“Sir, ma’am, would you want some brain freeze after your ride?”
Sausage McMuffins – the post-ride breakfast of champions. Seriously though, the salty sausage might help with rehydration when combined with a post-ride chug of water.

A few bad shifts and lack of top-end gearing aside, my TCX SLR 2 worked brilliantly. I have to admit, safety niggles aside, it was fun unleashing this bike’s potential especially on the much more open second lap. I kept the fenders on and brought my rain poncho as I wasn’t sure about this November’s weather, but even so the bike just hummed happily along without incident.

My Giant TCX SLR 2 enjoying a well-deserved rest.

I never did get to see my groupmates again; I tried calling them up from the finishers’ area. Apparently, Alex finished a few minutes after me, while Jogh and Ara suffered rear punctures close to the railroad crossing and finished quite late, but otherwise they enjoyed and completed the distance safely. It was their first time and I was glad they had a good ride. They were raving enough about it to invite me to the Alaska Cycle Philippines event in May 2015 this early!

Because “Strava or it didn’t happen,” as the kids say these days
I’m A485 and I finished the distance in 1:32:01. Alex Samson, A486, was a fellow groupmate, but didn’t succumb to punctures and finished a short while after I did.
Here’s Alex on his mountain bike.
Punctures and a late finish won’t dampen Jogh and Ara’s spirits!