
At its core, a cycle computer, alternatively called a “cyclocomputer” or “cyclocomp,” is a measurement tool for distance and speed. Ever considered, though, what else it could do if you rode your bike as a means of transport?
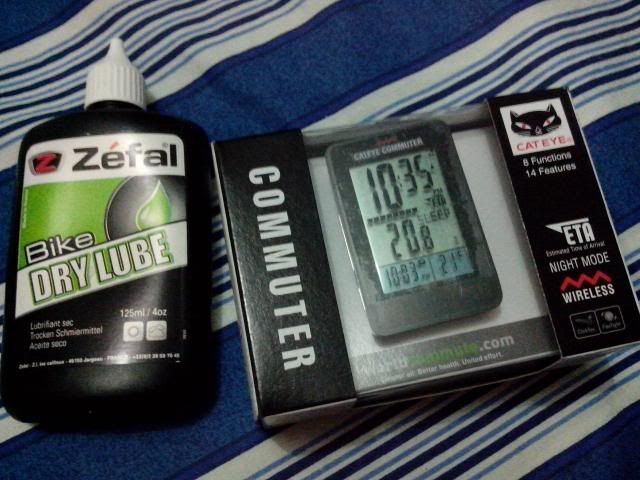
Osaka-based Cat Eye asked the same question and came up with the CC-COM10W…or the “Commuter” if the model name is a mouthful.
FEATURES
- Date and time
- Elapsed ride time
- Instant temperature measurement
- Speed measurements: instant, average, and maximum
- Distance measurements: Current, day, week, month, year, and total (odometer)
- “CO2 offset” measurements: Day, week, month, year, and total
- Electro-luminescent backlight on LCD, either instant or “Night Mode”
- Estimated Time of Arrival (ETA) function
HARDWARE
As this is a wireless cyclocomputer, it is dependent on two bits for data: a speed sensor mounted to one of the fork blades by two zip ties, and a small magnet you pinch to one of your front wheel’s spokes by screwing it into a plastic bracket. As the front wheel spins, the magnet passes through the sensor’s range, and its speed data is sent to the computer unit. Both the speed sensor and computer unit require their own CR2032 batteries.

The Commuter mounts on your handlebars or stem via Cat Eye’s now-ubiquitous FlexTight system, which makes use of a worm-geared strap and a thumb wheel to tighten. Once the strap is on, the Commuter mounts by sliding into the bracket, where it stays solidly locked in place. Physically separating it from the bracket is actually a daunting prospect at first, because Cat Eye say you have to pull the Commuter away from you while lifting up the edge nearest you. With practice this becomes easier.

Cat Eye says the plastic-bodied Commuter makes use of the “ClickTec” interface, which does away with all buttons on the front face. Instead, all three buttons are on the back of the unit, and while riding, you push down on the trailing edge of the Commuter’s face. This engages the primary “Mode” button on the back, for switching between modes per press, or resetting of current ride data to zero when held down for five seconds. This makes for a streamlined appearance and simplified operation, but introduces its own caveats – which I will discuss later.
SETUP
You enter setup mode by pressing the partially sunken Menu button on the back. The Commuter has to be off its bracket for this. Initial setup is done by date and time input, unit selection (metric or English), and most importantly the setting of your wheel’s circumference. On the 20″ x 1.5″ Schwalbe Marathon Racer tires I roll, this is 1490 mm. The manual contains a convenient table of circumference values if you don’t want to measure this via rollout method.
USE WHILE RIDING

The Commuter has a large two-tiered face with easy-to-see block numerals. Time and temperature readings are permanently displayed with smaller digits in a blue bar at the bottom. Another black bar, broken into ten segments, divides the two tiers – this is the ETA’s permanent display function.

The third button on the Commuter controls the backlight, and it’s mounted on the top right corner of the unit’s back side. Pushing it gives around four seconds of usable light. While the backlight is active, you can again press and hold the backlight button to activate Night Mode. Here, the first press on the face of the Commuter turns the backlight on, before cycling through the modes.
Speaking of which, below are the Commuter’s display modes while riding, with the top tier information mentioned first:
- ETA display + Instant speed
- Instant speed + Elapsed ride time
- Instant speed + Distance
- Instant speed + Average speed
- Instant speed + Maximum speed

ETA FUNCTION AND DISPLAY MODE MECHANICS
Most of the time, the larger top tier displays your current or instant speed reading, while the bottom tier cycles through distance, average and maximum speeds for the current ride session – pretty standard cyclocomputer stuff.
The main difference of the Commuter is the ETA function, which calculates your estimated time of arrival. This is based on your speed and a distance that you can either enter manually, or automatically taken from your most recent previous ride. The estimated time of arrival is then displayed on the top tier while you are riding in the ETA display mode, and updated in real time.

Earlier I mentioned the ten-segment black bar dividing top and bottom tiers. This is a permanent progress indicator for your ETA function distance. The closer you get to completing the ETA function distance, the more the bar fills up. When you do complete your distance, regardless of your current display mode, the Commuter will momentarily switch to ETA display mode and flash the digits around three times before reverting to the previous display mode.
This is a decidedly bicycle commuter-specific functionality and reflects Cat Eye’s focus with this cyclocomputer. However, there are a few flaws in the implementation.
The “Automatic” ETA setting assumes that your last ride’s distance will be repeated for the current ride. In reality, I don’t do this, and I would assume most don’t, as well. It makes for an idiot-proof kind of setup, but it’s also not a very smart implementation, either.
I find myself using the “Manual” ETA setting more often. This is hugely useful for distance training; it’s a good way of ensuring that you hit at least a target distance per ride. Unfortunately, for commute duty, it isn’t granular enough to be truly useful, because you have to set distance in whole units – either whole miles or whole kilometers. Cat Eye don’t give you the ability to further break distance down into fractions or decimal values. If you’re bike touring, this is fine; if you’re bike-commuting in the city, this is a strange limitation.
CO2 OFFSET CALCULATION FUNCTION
With the focus on environment friendliness, there will be people turning to bicycle commuting as a carbon-neutral form of transportation. The Commuter has a function for measuring exactly that.

Cat Eye have used a simple output value of roughly 140 g/km of CO2 for this, based on the 2008 vehicular average in Japan, and included it mainly for comparison purposes. Incidentally, this is just about the CO2 emission value that my own car, a 2005 Honda Jazz, was rated for in the UK. This isn’t an authoritative value however, as many cars since have been rated for much lower – a lot of cars have broken the magic 100 g/km CO2 barrier since 2012, especially in European countries where cars are taxed by emissions.
Basically the Commuter takes the 140 g/km CO2 emission figure hard-wired in its brains, and multiplies your distance to get a carbon offset value in kilograms. In the Philippine context, I think this is a nice-to-have feature, but is by no means essential. Treehuggers and hardcore environmentalists may brag about this value, though.
WEAKNESSES AND CAVEATS
The ClickTec interface is my main complaint about the Commuter. It works very well, and the five-second delay makes deleting a ride’s details a deliberate act. I think Cat Eye deliberately chose the five display modes to avoid information overload for the rider, which is great. However it also restricts the Commuter’s on-the-go functionality a little too much.

Readers who’ve used other cyclocomputers will notice that there is no easy way to access the total distance summary (or “odometer” reading) while on the go. This is a shame because the Commuter is versatile enough to report your distance for the past day, week, month or even year, too. To access the distance summaries, you have to physically take the Commuter out of its bracket and press the Menu button – there is no way of doing so while on the bike. Riders who use distance to determine replacement of parts like tires, brake pads and chains will find this annoying.

Distance summaries are not the only functionality hidden away in this manner. Even the CO2 offset calculation function, sharing the same day/week/month/year/total summary categories as distance, is also tucked away like this, which isn’t so bad. More baffling though is that the setup of the ETA function also requires physical removal of the Commuter – because it’s hidden in the Menu button as well! Cat Eye decided to take the ETA function – basically the unique selling proposition of the Commuter – and hid it so that manual changes to the ETA distance are more involved than they have to be.
Finally, all operations that require removal of the Commuter are done via combinations of pressing and holding the Menu and Mode buttons with your fingers. They’re not exactly the most comfortable buttons to push, as they are small, round, hard plastic things about as fun to push as a pimple. Yet Cat Eye require you to do data input with them, which means having to press the Mode button multiple times.
COMMUTER: YEA OR NAY?
So, overall, how is the Cat Eye Commuter cyclocomp as a product?
First, the negatives.
ClickTec is a great idea, reducing mental workload mid-ride, but it makes the Commuter too simplified for its own good, while introducing needless complication into other functions. I think it could do with at least two more buttons, maybe on the top left corner – opposite the nicely located backlight button.

Some people may balk at the thought of zip ties holding the speed sensor in place on the fork blade. A screwed-on bracket would no doubt be more secure, but so far I haven’t had issues with either speed sensor or magnet falling off my bike.
The carbon-offset functionality is neat, but ultimately it’s a gimmick. I think most riders may not find much use out of it. The implementation is done well enough here, though.
The ETA functionality, however, is a great idea – and here we kick off the positives. For Strava riders that regularly join the monthly mileage challenges, it’s a good way of tracking your distance progress in the background. Cat Eye need to finesse the execution further, particularly the allowance of partial-kilometer or partial-mile distance setting, and easing the manual distance setting itself, but this is a good start. We might see these features in a future update of the present Commuter – perhaps a CC-COM20W model.

The plastic-bodied Commuter is well-built – it stays securely attached, looks good and is reasonably weatherproof. The display can be a little picky with viewing angle, but it’s large enough to be seen even when installed level on a flat-handlebar bike, and the backlight works a treat.
Lastly, it’s a reasonably inexpensive addition to your bike, and it’s one of Cat Eye’s cheapest available wireless cyclocomps. Shop around and you can get one for as low as PhP1,400. It’s not the last word in functionality, but a few niggles aside, it does the basics very well.
VERDICT
Recommended. Not perfect, but reliable, fairly priced, and simple to use.


